GitSavvy
Full git and GitHub integration with Sublime Text
Details
Installs
- Total 87K
- Win 39K
- Mac 28K
- Linux 19K
| Jul 17 | Jul 16 | Jul 15 | Jul 14 | Jul 13 | Jul 12 | Jul 11 | Jul 10 | Jul 9 | Jul 8 | Jul 7 | Jul 6 | Jul 5 | Jul 4 | Jul 3 | Jul 2 | Jul 1 | Jun 30 | Jun 29 | Jun 28 | Jun 27 | Jun 26 | Jun 25 | Jun 24 | Jun 23 | Jun 22 | Jun 21 | Jun 20 | Jun 19 | Jun 18 | Jun 17 | Jun 16 | Jun 15 | Jun 14 | Jun 13 | Jun 12 | Jun 11 | Jun 10 | Jun 9 | Jun 8 | Jun 7 | Jun 6 | Jun 5 | Jun 4 | Jun 3 | Jun 2 | |
|---|---|---|---|---|---|---|---|---|---|---|---|---|---|---|---|---|---|---|---|---|---|---|---|---|---|---|---|---|---|---|---|---|---|---|---|---|---|---|---|---|---|---|---|---|---|---|
| Windows | 0 | 9 | 4 | 8 | 6 | 1 | 2 | 6 | 4 | 7 | 8 | 15 | 1 | 2 | 5 | 3 | 3 | 5 | 6 | 5 | 1 | 6 | 5 | 13 | 6 | 2 | 3 | 2 | 7 | 4 | 9 | 8 | 3 | 2 | 3 | 5 | 2 | 10 | 3 | 2 | 8 | 3 | 1 | 3 | 6 | 4 |
| Mac | 1 | 3 | 10 | 9 | 4 | 5 | 4 | 9 | 3 | 6 | 4 | 3 | 3 | 8 | 3 | 2 | 4 | 6 | 3 | 3 | 1 | 3 | 7 | 4 | 10 | 0 | 4 | 4 | 3 | 3 | 3 | 7 | 5 | 2 | 3 | 1 | 5 | 3 | 2 | 5 | 4 | 1 | 6 | 2 | 5 | 4 |
| Linux | 0 | 4 | 2 | 3 | 5 | 4 | 2 | 2 | 6 | 3 | 3 | 7 | 0 | 1 | 3 | 2 | 1 | 5 | 1 | 2 | 1 | 0 | 3 | 0 | 1 | 1 | 1 | 3 | 3 | 3 | 4 | 1 | 0 | 2 | 4 | 2 | 2 | 5 | 3 | 3 | 0 | 3 | 2 | 4 | 3 | 3 |
Readme
- Source
- raw.githubusercontent.com
GitSavvy


GitSavvy is a powerful and mature plugin for Sublime Text that brings most of Git's functionalities directly into the text editor.
Some users stick to Sublime Text because of GitSavvy.
Installation
Simple
- Install the Sublime Text Package Control plugin if you don't have it already.
- Open the command palette and start typing
Package Control: Install Package. - Enter
GitSavvy.
Less simple
If you want more control over what you pull down, or if you'd like to submit changes to GitSavvy (👈👌), you should clone the repository directly in the Packages folder and restart the editor. You still have to run Package Control: Satisfy Dependencies after that!
Note: GitSavvy requires Git versions at or greater than 2.18.0. However, it is highly recommended to use a more recent version of Git, as some advanced rebasing features in GitSavvy require at least version 2.38.0. Upgrading to the latest version of Git will ensure that you can take full advantage of all the features and improvements available in GitSavvy.
Note: GitSavvy does not support Sublime Text 2. If you are using Sublime Text 3, you can access the last supported version by checking out the st3-2.39.1 tag. That's to say, the current main line of GitSavvy only supports Sublime Text versions above build 4000. For the best experience, use the latest Sublime Text dev build. Or not, I mean it could also crash you, what am I to recommend here.
TLDR; aka Quick Start
When you first install GitSavvy, you may not notice any immediate changes to your Sublime Text interface. Except that you may see the checked out branch name and dirty status displayed in the status bar. (You can change this in the settings if you want to.) It's important to note that GitSavvy actually adds a lot of commands to Sublime's Command Palette, which can be accessed by pressing ctrl+shift+p on Windows or cmd+shift+p on macOS. These commands are typically prefixed with git:, while all GitHub features are prefixed with github:.
GitSavvy comes with dedicated views and is basically famous for it. In order to get started with GitSavvy, it's a good idea to become familiar with the git: status and git: Repo History views first. These views are a great entry point into the GitSavvy world and will help you get comfortable with the plugin before diving deeper into its other features. (In fact, I did not venture beyond the git: status view for the first year or so but hey, GitSavvy also changed a lot since then.)
In the special GitSavvy views, you can always toggle the help view by pressing [?]. In the Repo History. the most important keys to remember are [enter] for the main menu and [r] for the rebase menu.
Global shortcuts; aka Recommended Start
GitSavvy does not ship any global shortcuts as that would be rude; however, without defining any bindings on your own, you will get stuck as that's just not fast enough.
Here are some entry points into the GitSavvy world:
// The equivalent of `git status`
  { "keys": ["ctrl+shift+s"], "command": "gs_show_status"},

  // "all: true" or not true is up to you, *I* prefer "true" and configure
  // git's remotes to not fetch everything upstream, just a subset I'm interested
  // in.  Any way you decide, when the view is open, `[a]` will toggle that flag
  // dynamically.
  // Btw. you can use `f` to e.g. pick-axe, but it is IMO easier to just select
  // something in any view, and then to open the context menu (e.g. right mouse click),
  // choose: `GitSavvy: Pick-axe`.
  // By another way, you can use `l` to open a file/folder chooser to limit the
  // output, but I usually use the Command Palette (`fh` for `File History`) for that.
  { "keys": ["ctrl+shift+g"], "command": "gs_graph", "args": { "all": true }},

  // `gs_commit` is important as you can open it and if you haven't anything
  // staged it will show all changes.  Use `u` in the diff to unselect parts of
  // your changes. `[ctrl+enter]` will commit.
  { "keys": ["ctrl+shift+c"], "command": "gs_commit"},

  // *I* think the Line History is the quicker blame, so I use that actually a lot.
  // Select some line, e.g. `[ctrl+l]`, and then `[ctrl+shift+l]` to see the history
  // of the selected lines.  Works also in diffs, e.g. to follow the history of a hunk!
  { "keys": ["ctrl+shift+l"], "command": "gs_line_history"},

  // Navigate between changes, works in normal buffers and GitSavvy views.
  { "keys": ["ctrl+."], "command": "gs_super_next" },
  { "keys": ["ctrl+,"], "command": "gs_super_prev" },

  // "current_file: true" or not (t.i. show all changes) is up to you. *I* prefer
  // to start with "true". `[a]` will toggle between both modes.
  // `[l]` will open the file chooser, `[N]` and `[P]` switch to the next or previous
  // files immediately.
  // Use `[space]` to select individual lines. Or `[,]` and `[.]` and the two super
  // move commands above.
  // If you're happy, move along with e.g. `[c]` to commit or `[m]` to amend the previous
  // commit.
  {
      "keys": ["ctrl+shift+."],
      "command": "gs_diff",
      "args": { "current_file": true }
  },
  // I use the inline diff seldom but it has the `[a]`/`[b]` toggle to see the code
  // in one of the two states, before and after. And it has `[n]` and `[p]` to walk
  // back and forth in the file history...
  {
      "keys": ["ctrl+shift+,"],
      "command": "gs_inline_diff",
  },
  // ... but I actually prefer the command `gs_show_file_at_commit` ("Show File at HEAD")
  // which also has `[n]` and `[p]` walking but hides the diffing portion but just
  // shows Sublime Text's gutter annotations for changes.
  // Do note the `[l]` which let's you choose any revision of a file.
  // For completeness, e.g.:
  { "keys": ["ctrl+alt+shift+h"], "command": "gs_show_file_at_commit" },
That is a lot to digest and you haven't even checked out a different branch or anything.
To be honest, I create and checkout new branches usually using the Command Palette (chn).
More branching can be found in the Git: branch special view. E.g. [ctrl+shift+s, tab]
(open the status view, then shift to the branches sub view using [tab]). Obviously you
can create branches here as well, here using [b]. But you can also create branhces in the
Repo History. Very often there are multiple ways to the same goal.
The Repo History is your friend for anything really. Lesser known is the [s] knob that
hides all commits so you can quickly see the branches and tags only. Using [ctrl+r] you
can quickly search and select a branch or tag.
Use [o] to see the full commit/patch under cursor, then [p] and [n] to walk the history.
When you spot an spelling in one of the commit messages, [W] will let you reWord the message.
Or use [space] to select two commits, then open the main menu with [enter] to open a diff
between them for example.
Or [N] (and [P]) to see and walk the reflog, i.e. to flip in the previous position/tip of
your current branch (@{1}). (For example to check or undo a rebase.)
You see, endless, deep, savvy features.
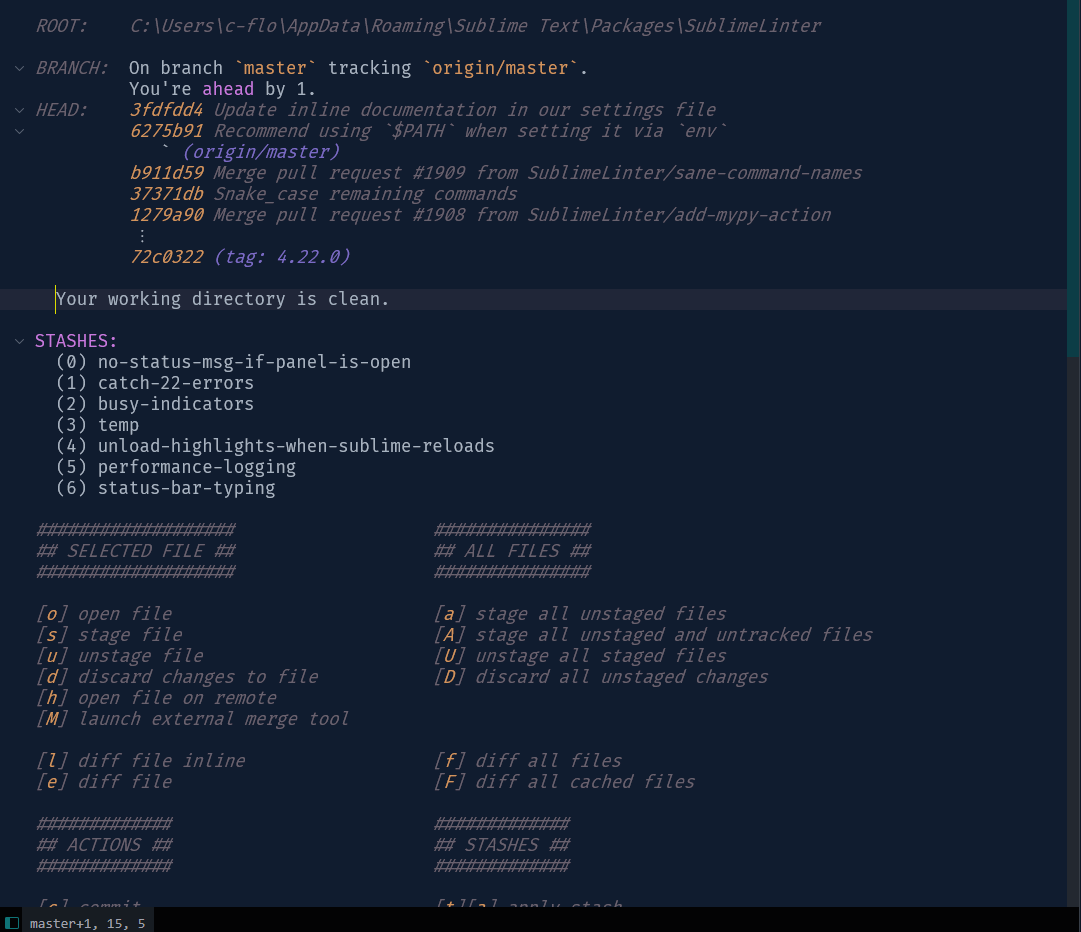
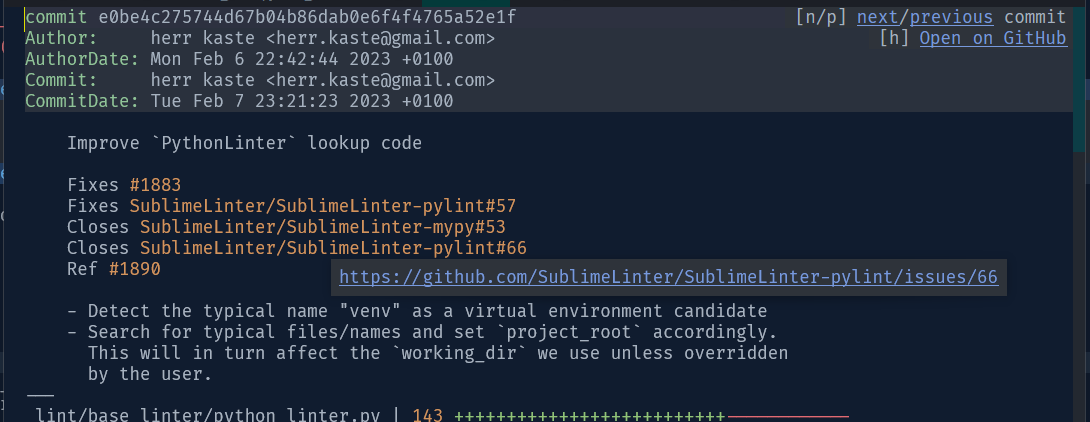
Repo History
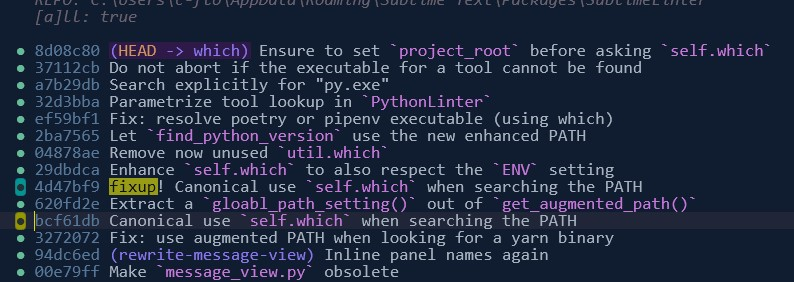
|
|
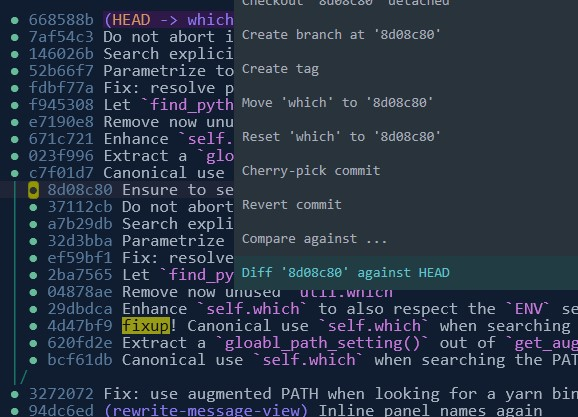
| Note the visual connection between fixup commits and the commits they are associated with. | When the cursor is positioned on a fixup (or squash) commit, the [r]ebase menu will provide a specific action to apply that fixup. |
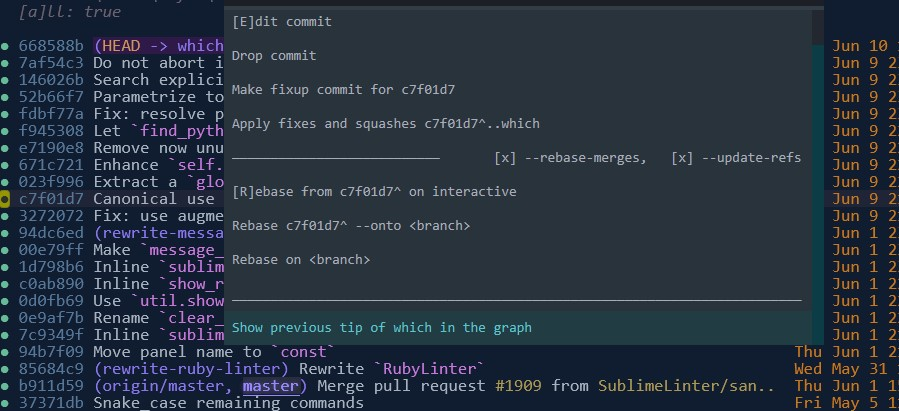
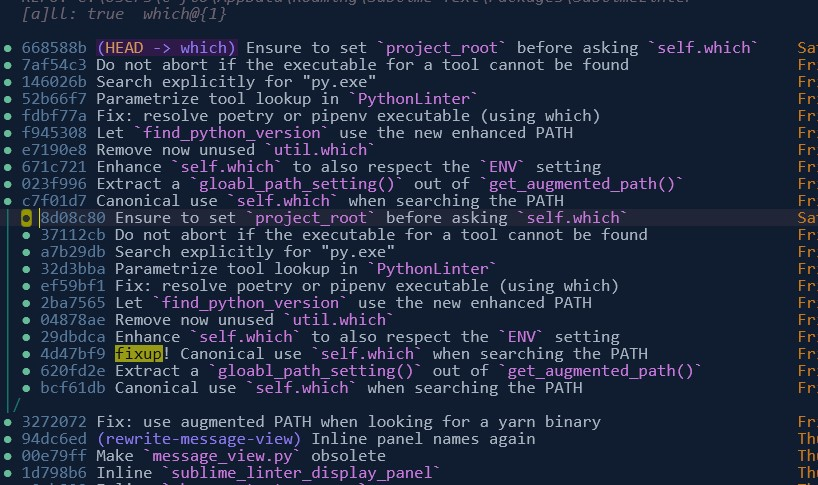
You can review any rebase afterwards. E.g.
|
|
|
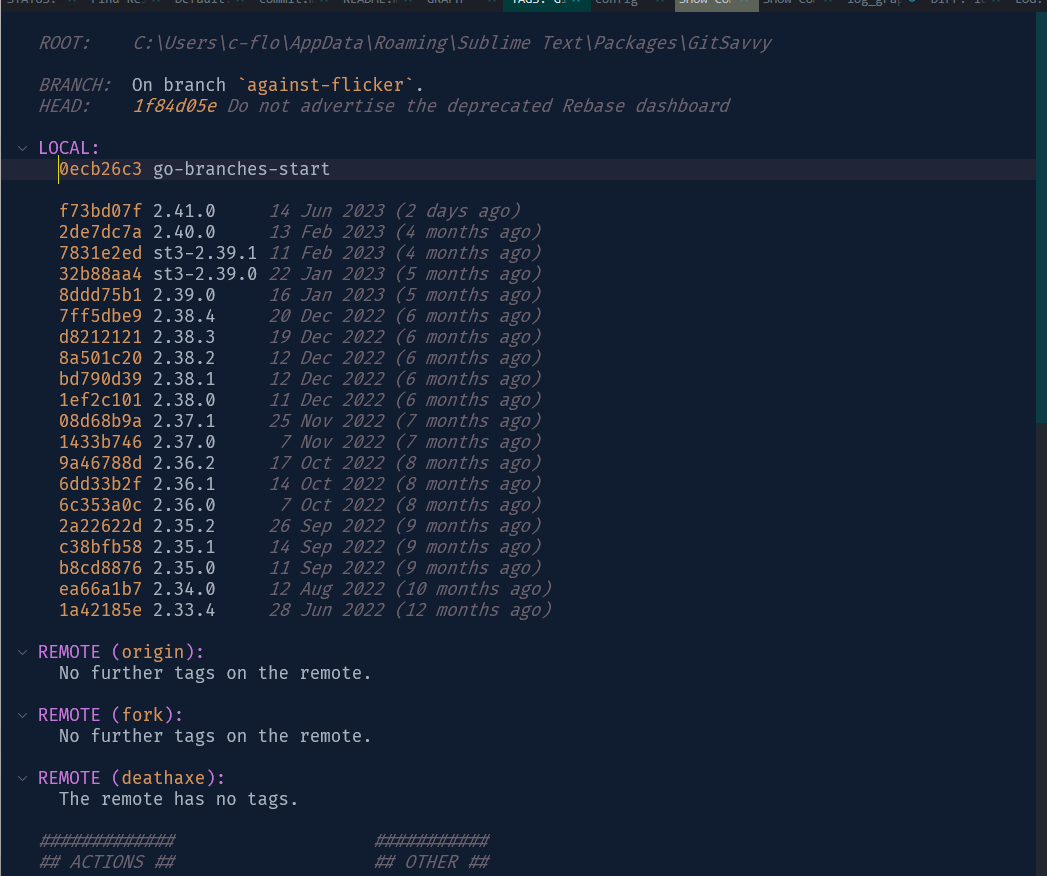
| Open the [r]ebase menu again. (The currently checked out branch is named “which” here.) | Show the previous tip of the currently checked out branch side by side. | Showing the main menu, maybe show a diff between both variants or undo by selecting “Move …”. |
If you encounter merge conflicts that need to be resolved manually, displaying the diff can help ensure that you haven't introduced any unintended changes or made mistakes. (In most cases, the diff will be empty, indicating that both tips are identical in terms of code.) From the main menu you can also choose to “Move” or to “Reset” the branch back to the previous tip, effectively undoing the rebase. “Move” will simply move the branch label, while “Reset” performs your typical reset operation that can also modify Git's staging area and discard uncommitted changes, depending on the mode you choose. Usually choose “Move” here to undo a rebase.
Line History
GitSavvy has a feature called “Line History,” also known as git's “wtf?” view. This allows you to view the commit history of specific lines within the repository. It's a great way to quickly research the history of a particular piece of code before using the traditional blame view.
To access Line History, you can start on any normal view by selecting some lines, such as a function, and then issuing the git: Line History command from the command palette. But really, you can start on any diff/patch that GitSavvy shows you.
To make it more seamless, I recommend, again, to make a shortcut. For example, you can add the following to your user keybindings:
{ "keys": ["ctrl+shift+l"], "command": "gs_line_history"},
Once you have that, you can use ctrl+l to select some lines, followed by ctrl+shift+l to follow
those lines.
GitSavvy will then show you snippets of commits/patches to show you the evolution of those lines.
[o] on such an excerpt will open the complete commit. [O] will display the version of the file
as it existed at that specific point in time. And [f] for example will initiate a fixup commit
for the commit under the cursor. (Either with the stage, or with all changes if nothing is staged
yet, as usual.)
Tip: The Line History is also available from any view where we show a diff or patch. (It is thus available from within the Line History views.) On such a view you don't necessarily have to select any lines, as it will select the current hunk for you by default, giving you the “hunk-history”, so to speak.
Even deeper: After [o] or [O] you can navigate around in time with [n] (next) and [p]
(previous). In file-at-commit views, [N] skips unrelated file revisions and jumps to the previous
revision that changed the code currently visible in the viewport. [P] returns through those jumps.
This is useful when you want to follow the evolution of a function or feature without stepping through
every noisy commit that touched the file. You can show the commit's context using [g], open
blame for the current revision with [b], and show the hunks context by opening the inline diff.
That's easier with more keybindings:
{ "keys": ["ctrl+shift+,"], "command": "gs_inline_diff" },
  { "keys": ["ctrl+shift+."], "command": "gs_diff", "args": {"current_file": true} },
That's pretty crazy, right? All views are connected, and you can really navigate around the history.
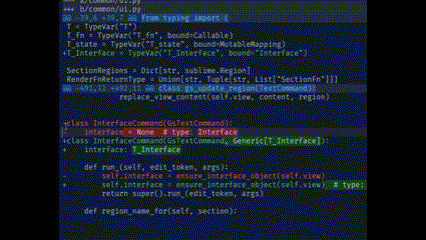
Git Diff View
GitSavvy provides a git diff view that allows users to stage, unstage, and reset (discard) files, hunks, or individual lines.
Fixup/Squash Helpers
GitSavvy offers fixup/squash helpers that can be accessed from various views, including the “Line History” view.
GitHub Integration
GitSavvy provides GitHub integration that allows users to reference issues/collaborators when committing, open the current file or a commit on GitHub at the selected line, and create a new pull request from the current branch.
GitHub-Style Blame View
GitSavvy offers a “blame” view that shows hunk metadata and allows users to view the commit that made the change, similar to GitHub's blame view. In file-at-commit views, [b] opens blame for that revision at the same visible position.
Other highlights
| Status dashboard | Tags dashboard |
|---|---|
|
|
| Display and overview and offer actions to manipulate your project state. | View and manipulate local and remote tags. |
| Diff |
|---|
|
| Stage, unstage or discard hunks, files or individual lines. (video) |
| Github integration |
|---|
|
| Reference issues and collaborators in commits. Open files on GitHub in the browser, with lines pre-selected. Create pull requests. Fork a repository. |