Lightning
Sublime Plugin for Aura
Details
Installs
- Total 7K
- Win 5K
- Mac 2K
- Linux 414
| Feb 20 | Feb 19 | Feb 18 | Feb 17 | Feb 16 | Feb 15 | Feb 14 | Feb 13 | Feb 12 | Feb 11 | Feb 10 | Feb 9 | Feb 8 | Feb 7 | Feb 6 | Feb 5 | Feb 4 | Feb 3 | Feb 2 | Feb 1 | Jan 31 | Jan 30 | Jan 29 | Jan 28 | Jan 27 | Jan 26 | Jan 25 | Jan 24 | Jan 23 | Jan 22 | Jan 21 | Jan 20 | Jan 19 | Jan 18 | Jan 17 | Jan 16 | Jan 15 | Jan 14 | Jan 13 | Jan 12 | Jan 11 | Jan 10 | Jan 9 | Jan 8 | Jan 7 | |
|---|---|---|---|---|---|---|---|---|---|---|---|---|---|---|---|---|---|---|---|---|---|---|---|---|---|---|---|---|---|---|---|---|---|---|---|---|---|---|---|---|---|---|---|---|---|
| Windows | 0 | 0 | 0 | 0 | 0 | 0 | 0 | 0 | 0 | 1 | 0 | 0 | 0 | 0 | 0 | 0 | 0 | 0 | 0 | 0 | 0 | 0 | 0 | 0 | 0 | 0 | 0 | 0 | 0 | 0 | 0 | 0 | 0 | 0 | 0 | 0 | 0 | 0 | 0 | 0 | 0 | 0 | 0 | 0 | 0 |
| Mac | 0 | 0 | 0 | 0 | 0 | 0 | 0 | 0 | 0 | 1 | 0 | 0 | 0 | 0 | 0 | 0 | 0 | 0 | 0 | 0 | 0 | 0 | 0 | 0 | 0 | 0 | 0 | 0 | 0 | 0 | 0 | 0 | 0 | 0 | 0 | 0 | 0 | 0 | 0 | 0 | 0 | 0 | 0 | 0 | 0 |
| Linux | 0 | 0 | 0 | 0 | 0 | 0 | 0 | 0 | 0 | 0 | 0 | 0 | 0 | 0 | 0 | 0 | 0 | 0 | 0 | 0 | 0 | 0 | 0 | 0 | 0 | 0 | 0 | 0 | 0 | 0 | 0 | 0 | 0 | 0 | 0 | 0 | 0 | 0 | 0 | 0 | 0 | 0 | 0 | 0 | 0 |
Readme
- Source
- raw.githubusercontent.com
Sublime Lightning
Sublime Plugin for Lightning Component Development
This plugin requires Sublime Text 3 and works in conjunction with the Force CLI. You can download the version of Force CLI for your OS here: https://force-cli.herokuapp.com
Make sure that you have installed the Force CLI force binary into a folder on your path, and that it's marked as executable.
To install the sublime-lightning plugin, first install Package Control. Installation instructions are here: https://sublime.wbond.net/installation. Once Package Control is installed, open the Command Palette from Tools > Command Palette, type 'install' and select 'Package Control: Install Package'. Search for 'lightning' and then install the package from the results.
Once you have both of these installed, create a new folder to be your working folder.
mkdir mywork
cd mywork
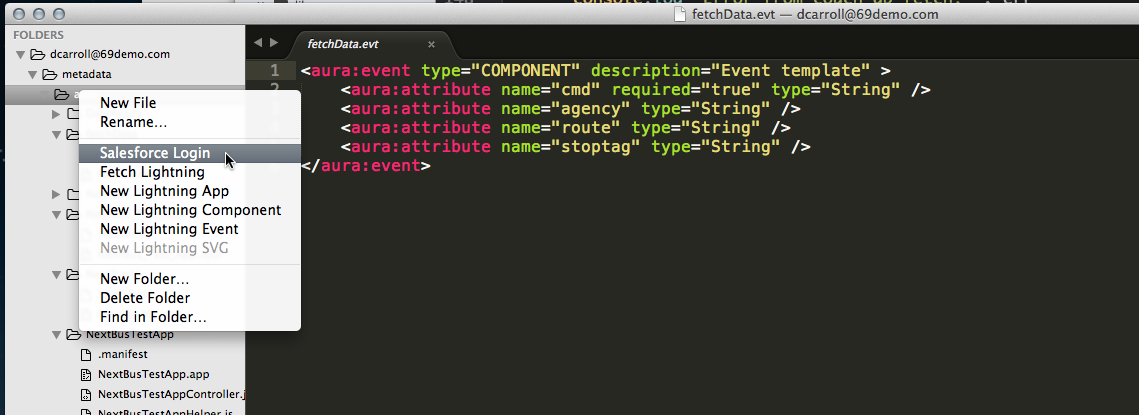
Launch Sublime Text and open the new folder. If you haven't logged in recently from the command line, you can right-click the folder in Sublime's sidebar and select “Salesforce Login”. In the bottom tray of Sublime enter your username and hit the enter key, enter your password (shown in clear text, sorry), and hit the Enter key.
Note: If you receive the error message, “Sublime Lightning Plugin requires the Force.com CLI to function..” and you are certain that the CLI is in your path and is marked as executable, you can try installing the Fix Mac Path plugin, which might solve the issue.
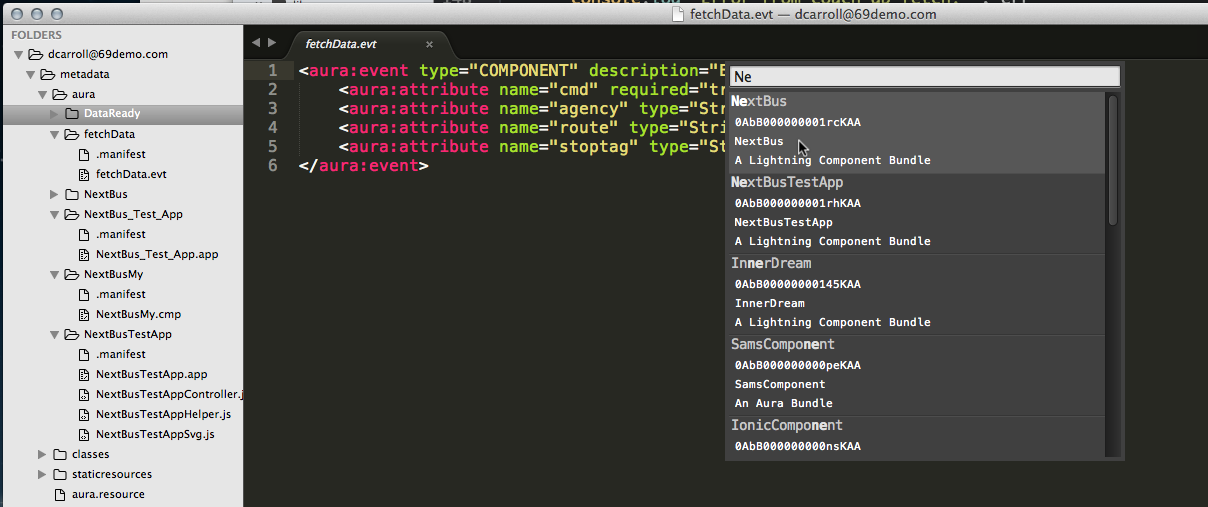
At this point, you won't be able to create Lightning resources, unless you have a folder under your work directory named 'metadata/aura'. You can, however, fetch existing Lightning resources by right-clicking the work folder and selecting “Fetch Lightning”. This queries your Salesforce instance for all Lightning bundles and display them for you to choose which you want to edit. You can choose all Lightning bundles, scroll to the specific bundle you want, or begin typing the name of the Lightning bundle to filter the list and then select the one you want.
Once you have a Lightning bundle locally in SublimeText, you can begin editing your component, controller, event, app, or styles. To save your changes back to Salesforce, simply press CMD+S on your Mac or CTRL+S on your Windows machine. You'll see a verification of the save and the time it took in the status bar at the bottom of the screen. You might also, or instead, see errors that prevented saving your changes back to Salesforce.
To create a new Lightning bundle, right-click the “aura” folder and select the type of component that you want to create. You are prompted for a name at the bottom of the screen. Enter a name and hit enter. Once your bundle is created, you can right-click the bundle folder and add other artifacts to your bundle as appropriate for the bundle type.
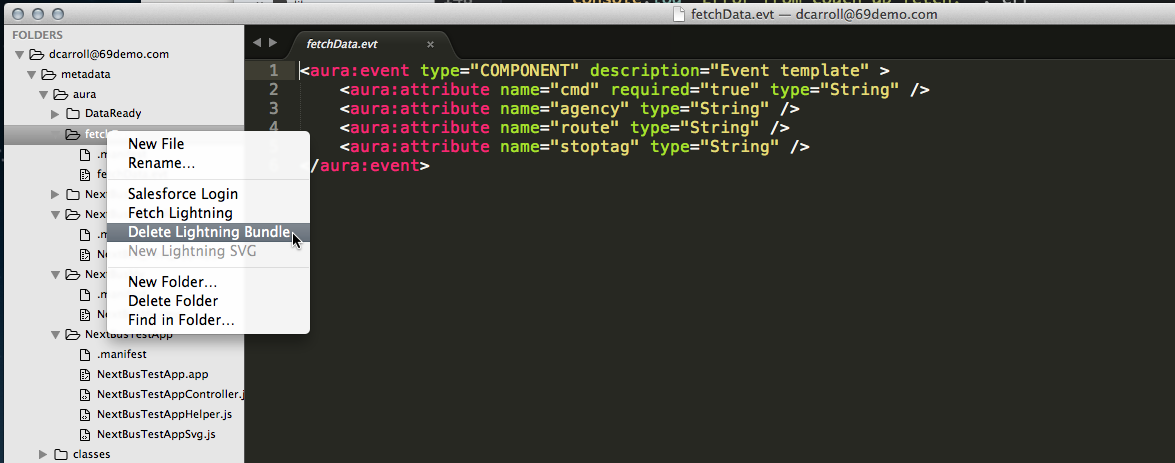
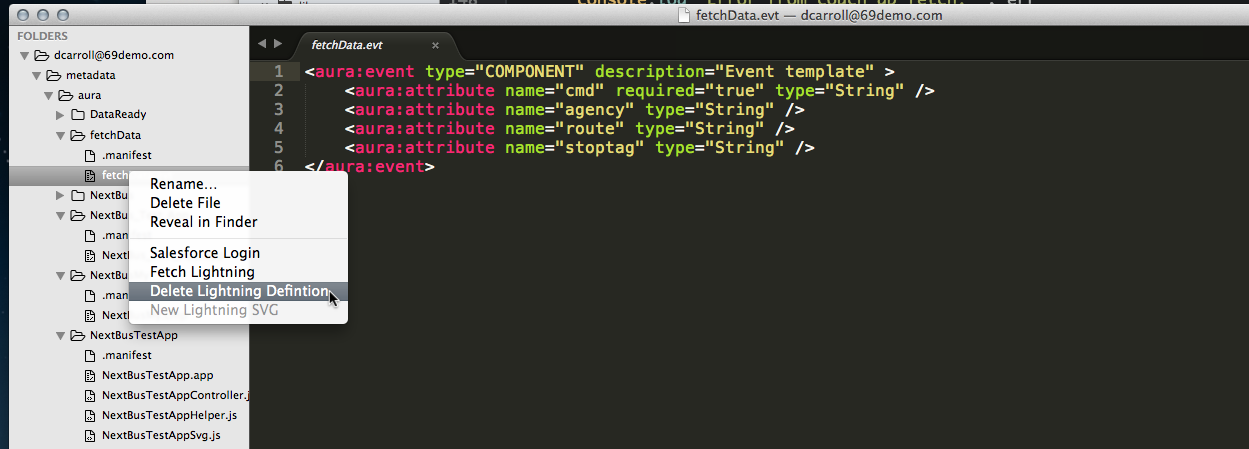
Deleting artifacts is accomplished by right-clicking the file and selecting “Delete Lightning Definition”. This will only delete the selected file and remove that artifact from the bundle both locally and on Salesforce. If you want to delete the entire bundle, right-click the bundle folder and select “Delete Lightning Bundle”. Deletes CANNOT be undone and there is no confirmation prompt in the current version of the plugin.
You can safely right-click any file or folder and select the Sublime menu item for deleting file or folder, as what is saved locally is a copy of what is in Salesforce. You can easily retrieve the Lightning bundle or artifact by re-fetching, right-click and select “Fetch Lightning”.


See “how to” video below.
