Syncrow
Create and Sync Snippets.
Details
Installs
- Total 508
- Win 309
- Mac 114
- Linux 85
| Feb 24 | Feb 23 | Feb 22 | Feb 21 | Feb 20 | Feb 19 | Feb 18 | Feb 17 | Feb 16 | Feb 15 | Feb 14 | Feb 13 | Feb 12 | Feb 11 | Feb 10 | Feb 9 | Feb 8 | Feb 7 | Feb 6 | Feb 5 | Feb 4 | Feb 3 | Feb 2 | Feb 1 | Jan 31 | Jan 30 | Jan 29 | Jan 28 | Jan 27 | Jan 26 | Jan 25 | Jan 24 | Jan 23 | Jan 22 | Jan 21 | Jan 20 | Jan 19 | Jan 18 | Jan 17 | Jan 16 | Jan 15 | Jan 14 | Jan 13 | Jan 12 | Jan 11 | |
|---|---|---|---|---|---|---|---|---|---|---|---|---|---|---|---|---|---|---|---|---|---|---|---|---|---|---|---|---|---|---|---|---|---|---|---|---|---|---|---|---|---|---|---|---|---|
| Windows | 0 | 0 | 0 | 0 | 0 | 1 | 0 | 0 | 0 | 0 | 0 | 0 | 0 | 0 | 0 | 0 | 0 | 0 | 0 | 0 | 0 | 0 | 0 | 0 | 0 | 0 | 0 | 0 | 0 | 0 | 0 | 0 | 0 | 0 | 0 | 0 | 0 | 0 | 0 | 0 | 0 | 0 | 0 | 0 | 0 |
| Mac | 0 | 0 | 0 | 0 | 0 | 0 | 0 | 0 | 0 | 0 | 0 | 0 | 0 | 0 | 0 | 0 | 0 | 0 | 0 | 0 | 0 | 0 | 0 | 0 | 0 | 0 | 0 | 0 | 0 | 0 | 0 | 0 | 0 | 0 | 0 | 0 | 0 | 0 | 0 | 0 | 0 | 0 | 0 | 0 | 0 |
| Linux | 0 | 0 | 0 | 0 | 0 | 0 | 0 | 0 | 1 | 0 | 0 | 0 | 0 | 0 | 0 | 0 | 0 | 0 | 0 | 0 | 0 | 0 | 0 | 0 | 0 | 0 | 0 | 0 | 0 | 0 | 0 | 0 | 0 | 0 | 0 | 0 | 0 | 0 | 0 | 0 | 0 | 0 | 0 | 0 | 0 |
Readme
- Source
- raw.githubusercontent.com
Syncrow
A Sublime Text 3 Plugin. Create and Sync your snippets.
All the snippets are synced at http://www.syncrow.in.
Easy Installation
You can install it through the Package Control.
Press ⌘/Ctrl + ⇧ + P to open the command palette.
Type Package Control: Install Package and press enter. Then search for Syncrow.
Manual Installation
Clone this repo.
Open Sublime text 3.
Navigate to Preferences > Browse Packages
Open User folder.
Paste the content of the repo into this folder.
Usage
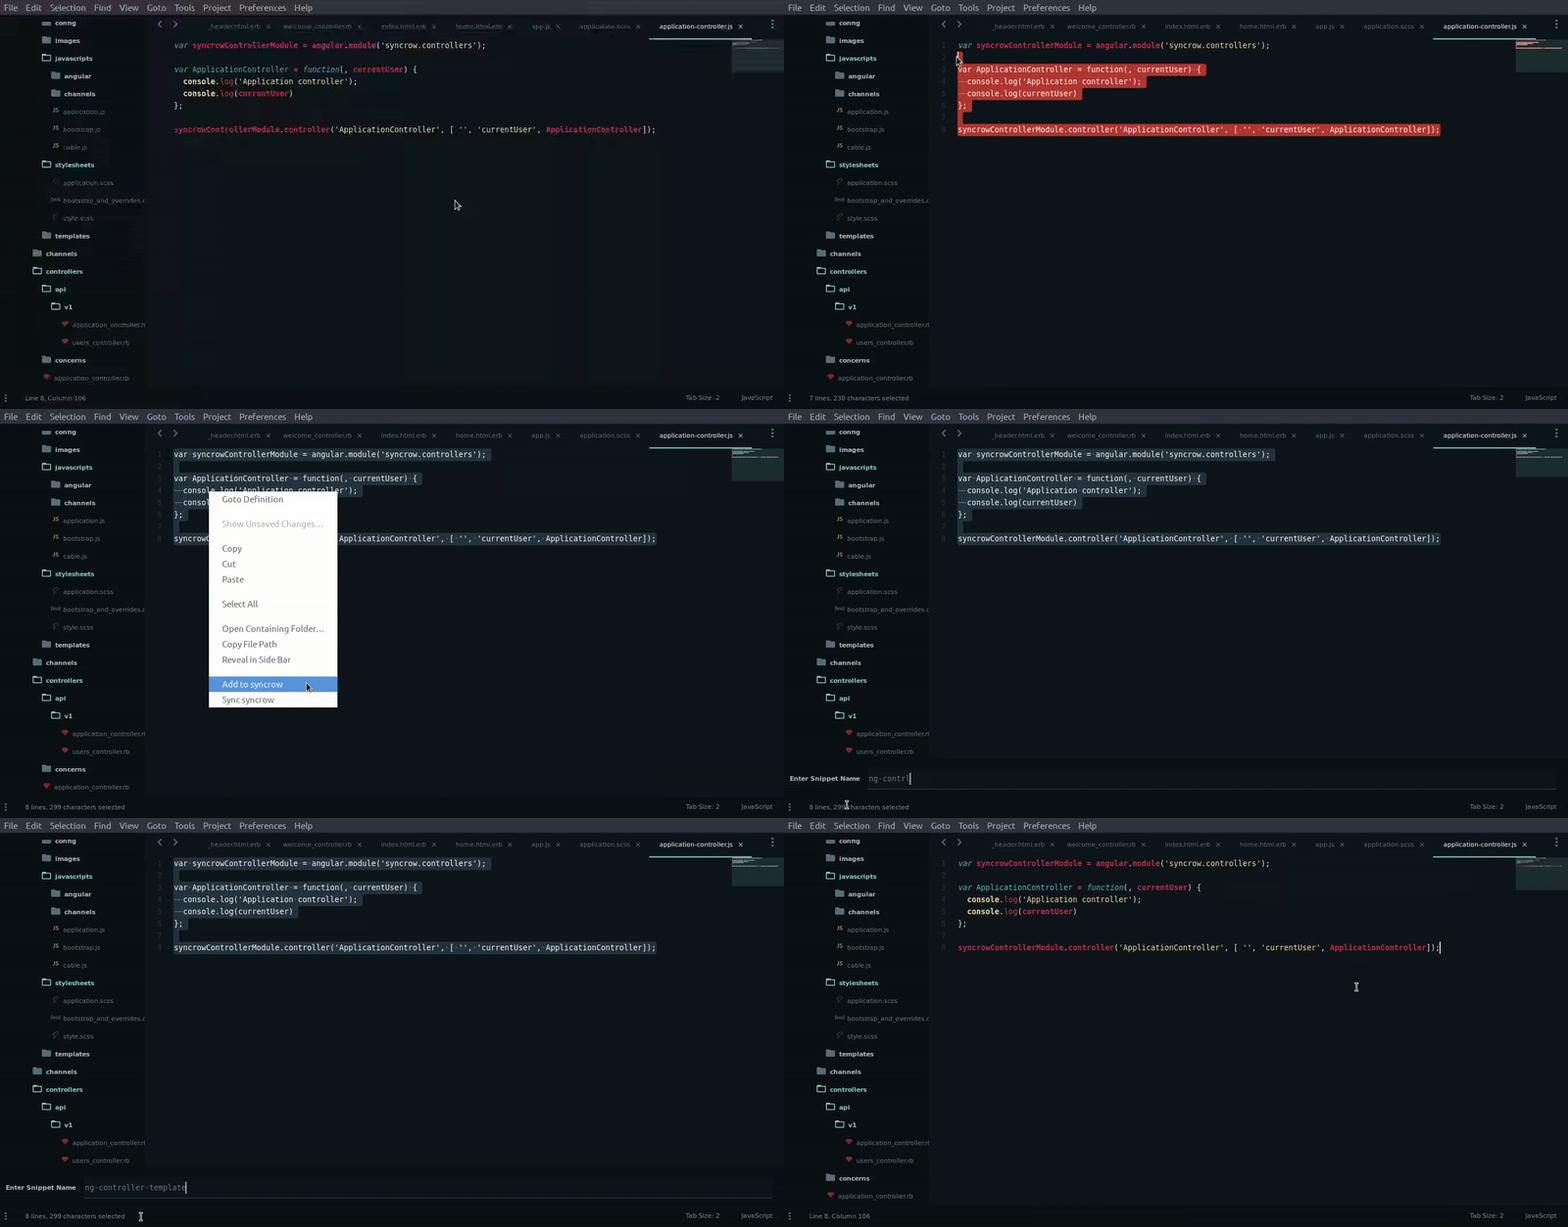
Select the code/text you want to save.
Right Click and click on “Add to syncrow” OR use syncrow shortcuts (See Below).
Enter the name of the snippet. Press Enter.

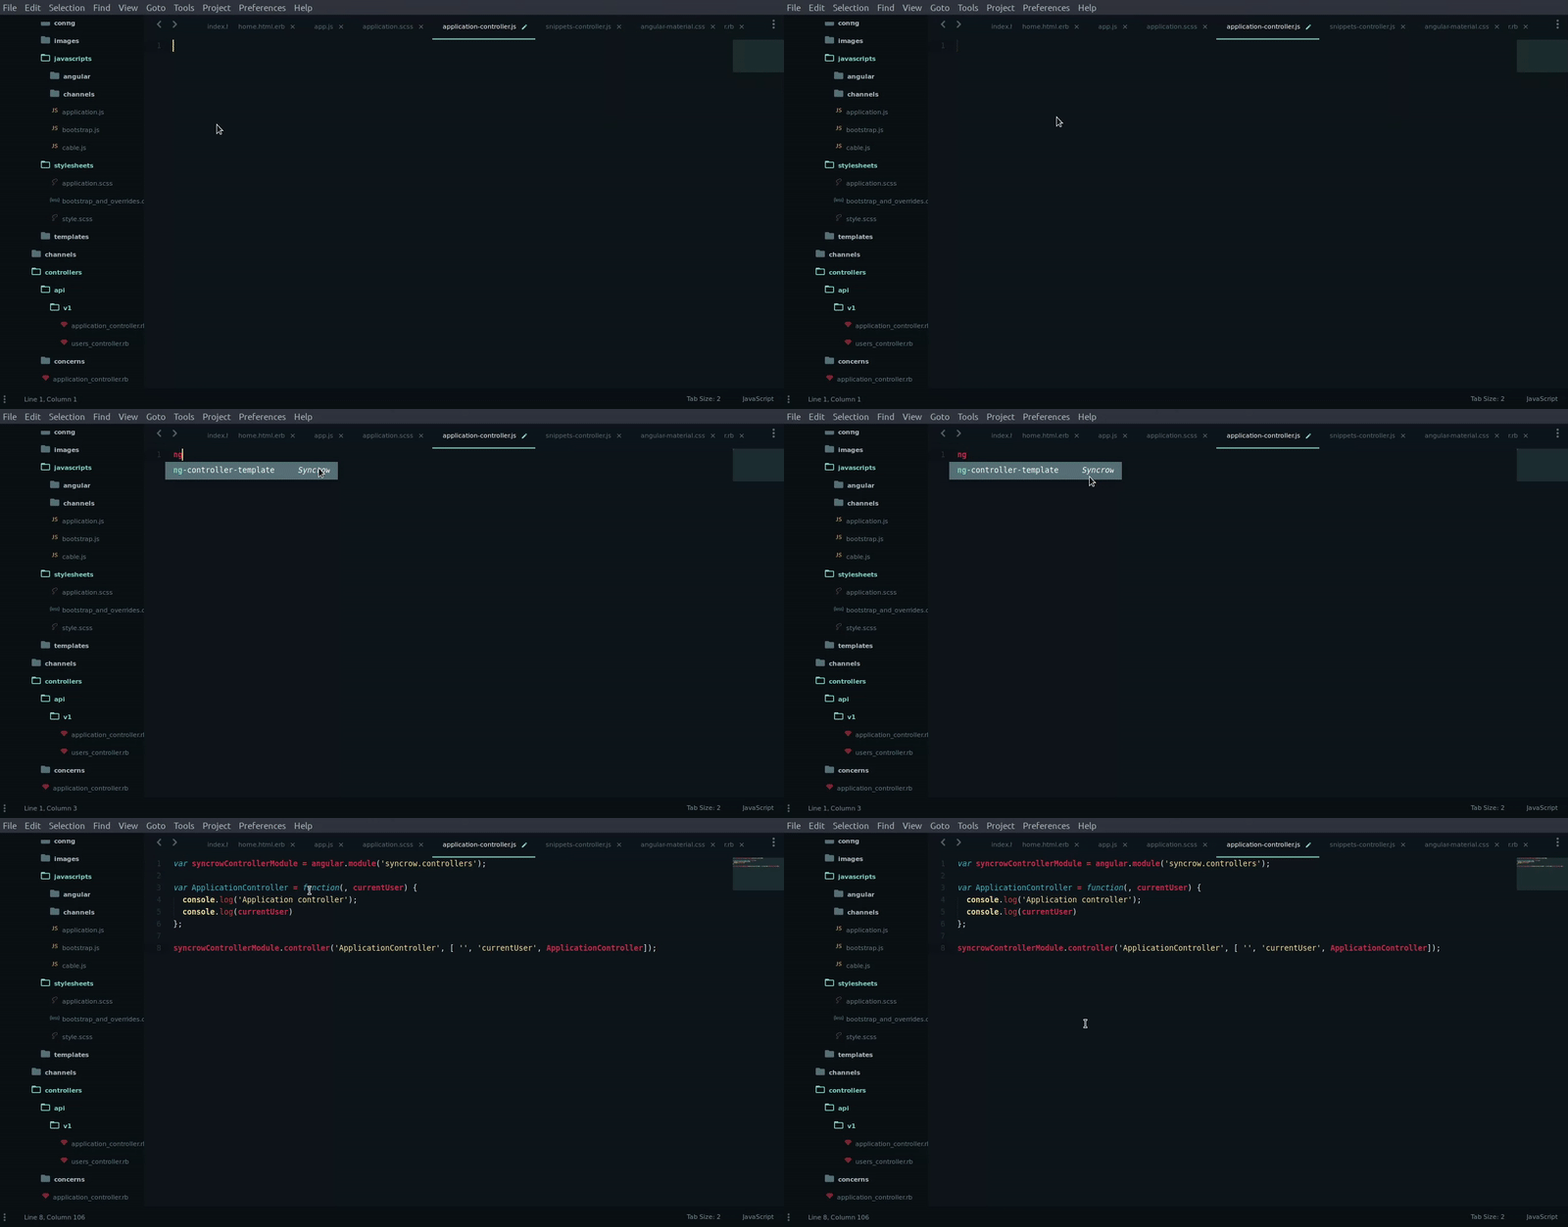
- Thats it. The snippet will now appear in the autocomplete popup.

Enable Sync
Visit http://www.syncrow.in
SignUp and generate a Syncrow Key.
Open Sublime Text 3.
Navigate to Preferences > Settings.
Add this line: “syncrow_key”: “YOUR_SYNCROW_KEY”
Right Click and click on “Sync syncrow”.
Voila!
Shortcuts
MacOSx: Super + Shift + x
Linux: Ctrl + Shift + x
