ChoiceScript
ChoiceScript Syntax for Sublime
Details
Installs
- Total 547
- Win 364
- Mac 123
- Linux 60
| Jul 21 | Jul 20 | Jul 19 | Jul 18 | Jul 17 | Jul 16 | Jul 15 | Jul 14 | Jul 13 | Jul 12 | Jul 11 | Jul 10 | Jul 9 | Jul 8 | Jul 7 | Jul 6 | Jul 5 | Jul 4 | Jul 3 | Jul 2 | Jul 1 | Jun 30 | Jun 29 | Jun 28 | Jun 27 | Jun 26 | Jun 25 | Jun 24 | Jun 23 | Jun 22 | Jun 21 | Jun 20 | Jun 19 | Jun 18 | Jun 17 | Jun 16 | Jun 15 | Jun 14 | Jun 13 | Jun 12 | Jun 11 | Jun 10 | Jun 9 | Jun 8 | Jun 7 | |
|---|---|---|---|---|---|---|---|---|---|---|---|---|---|---|---|---|---|---|---|---|---|---|---|---|---|---|---|---|---|---|---|---|---|---|---|---|---|---|---|---|---|---|---|---|---|
| Windows | 0 | 0 | 0 | 0 | 0 | 0 | 0 | 0 | 0 | 0 | 0 | 0 | 0 | 0 | 0 | 0 | 1 | 0 | 0 | 0 | 0 | 0 | 0 | 0 | 0 | 0 | 0 | 0 | 0 | 0 | 0 | 0 | 0 | 0 | 0 | 0 | 0 | 0 | 0 | 0 | 0 | 0 | 0 | 0 | 0 |
| Mac | 0 | 0 | 0 | 0 | 0 | 0 | 0 | 0 | 0 | 0 | 0 | 0 | 0 | 0 | 0 | 0 | 0 | 0 | 0 | 0 | 0 | 0 | 0 | 0 | 0 | 0 | 0 | 0 | 0 | 0 | 0 | 0 | 0 | 0 | 0 | 0 | 0 | 0 | 0 | 0 | 0 | 0 | 0 | 0 | 0 |
| Linux | 0 | 0 | 0 | 0 | 0 | 0 | 0 | 0 | 0 | 0 | 0 | 0 | 3 | 0 | 0 | 0 | 0 | 0 | 0 | 0 | 0 | 0 | 0 | 0 | 0 | 0 | 0 | 0 | 1 | 0 | 0 | 0 | 0 | 0 | 0 | 0 | 0 | 0 | 0 | 0 | 0 | 0 | 0 | 0 | 0 |
Readme
- Source
- raw.githubusercontent.com
ChoiceScript Syntax for Sublime
❕ Version 1.0.0
This is a custom syntax highlighter with custom autocompletes and optional color scheme created for ChoiceScript. Developed to make reading and writing ChoiceScript code quicker and easier, with the included “ChoiceScript” color scheme it targets specific aspects of code to differentiate via color.
It is compatible with Sublime 3 and 4.
⚠️ This is NOT an IDE like CSIDE.
It does not include a copy of ChoiceScript. It cannot run QuickTest or RandomTest. It does not check for bugs or errors. It does not include a word count. You must have a copy of ChoiceScript (or CSIDE) on your computer or use the web version of CSIDE to run your game.
Table of Contents
- Features
- Installation
- Color Scheme
- Screenshots
- Autocomplete Commands
- ChoiceScript Tips
- Editing and Customization
- Contact Me
- Disclaimer
Features
- Custom syntax highlighting for the ChoiceScript language.
- Full support for multireplace and stat charts.
- Custom color scheme for enhanced syntax highlighting.
- Autocomplete commands to quickly create common lines of code (page breaks, line breaks, choices, if/else statements, stat charts, comments, etc).
- Auto-indent following appropriate lines of code (
*choice,#options,*if/else,*stat_chart). - Spell check for plain text and text for choice options and text in multireplace.
- Word wrap automatically enabled, tabs to indent conversion enabled, auto match disabled (to keep from matching quotes).
Installation
The ChoiceScript syntax can be installed one of two ways, regardless of whether you're using Sublime 3 or 4:
📦 Package Control
- In Sublime, go to Tools > Install Package Control…
- Open the Command Palette by pressing (MAC) CMD + Shift + P OR (PC) CTRL + Shift + P.
- Type
Package Control: Install Packageinto the Command Palette. - In the new Package Control window, type
ChoiceScriptwith no spaces. - Select “ChoiceScript” to install the syntax and color scheme.
- On a
.txtscene file, go to the bottom right of the Sublime window where it says “Plain Text.” Click it and select “ChoiceScript” from the list of syntaxes. - You're now ready to write ChoiceScript in Sublime!
🛠 Manual Installation
- On this repository, click “Code” above the files.
- Select “Download ZIP” and if prompted, choose where to save the folder.
- Extract the contents of the zipped folder.
- In Sublime, go to (MAC) Sublime Text > Preferences > Browse Packages… OR (PC) Preferences > Browse Packages… to open your Sublime
Packagesfolder. - Copy and paste the extracted
ChoiceScriptfiles directly into thePackagesfolder. - In Sublime, on a
.txtscene file, go to the bottom right of the Sublime window where it says “Plain Text.” Click it and select “ChoiceScript” from the list of syntaxes. - You're now ready to write ChoiceScript in Sublime!
🌈 Using the Color Scheme
- Go to (MAC) Sublime Text > Preferences > Select Color Scheme OR (PC) Preferences > Select Color Scheme. (On Sublime 3, it's “Color Scheme…”)
- Select the “ChoiceScript” color scheme.
- You're now all set with the ChoiceScript syntax highlighter and custom color scheme!
Color Scheme
Included is an optional color scheme designed for the syntax. Since it was created for this specific syntax definition, it is able to target more specific parts of code to allow for enhanced highlighting.
It recognizes:
- Variables vs plain text in multireplace.
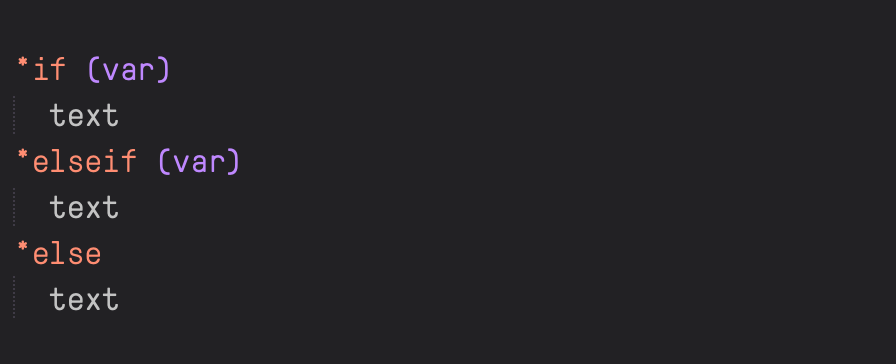
- Variables vs operators in
*if/*elsestatements, includingandandor. - Image file names in
*imageand*text_imagecommands. - When an
*if/elseor*selectable_ifis immediately followed by an#optionwithout a line break. - When a value is set to
truevsfalsein*create,*temp, and*set. - When a
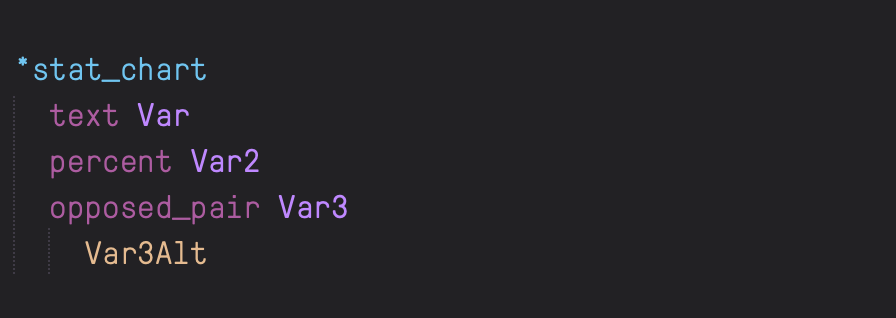
*page_breakis followed by plain text. - Commands vs variables vs plain text in
*stat_chart.
Some of this does carry over rather well to other color schemes, but the custom color scheme was designed alongside the syntax highlighter to highlight with greater thoroughness and accuracy for ChoiceScript.
⚙️ Using the Color Scheme JUST for ChoiceScript
If you want to use the ChoiceScript color scheme only with ChoiceScript files, you can do so by following these steps:
- With your ChoiceScript file active on Sublime, go to (MAC) Sublime Text > Preferences > Settings - Syntax Specific OR (PC) Preferences > Settings - Syntax Specific
- A new window will open. On the left is the full range of Sublime settings you can configure. On the right is the settings configuration for that specific syntax.
- In the file on the right, edit the file to look like this:
{
    "color_scheme": "ChoiceScript.sublime-color-scheme",
}
- Save.
From now on, all files with ChoiceScript syntax will use the ChoiceScript color scheme, regardless of what your theme or overall color scheme is in the rest of Sublime.
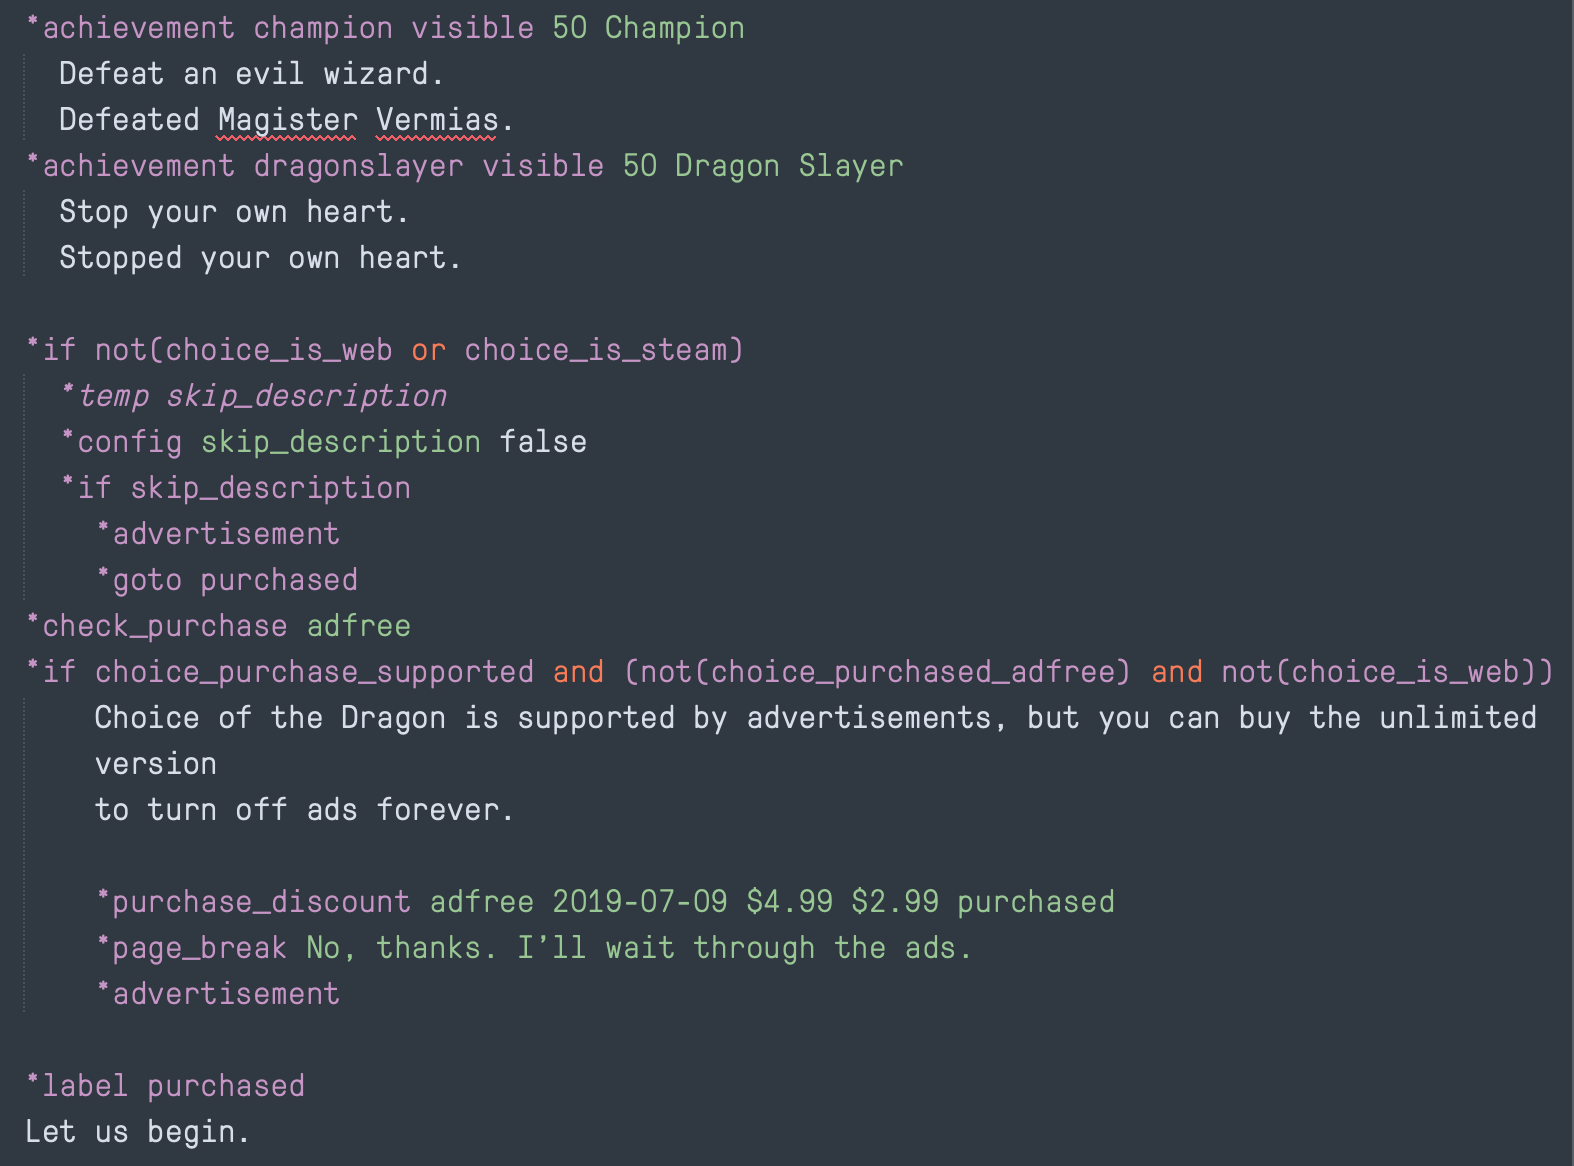
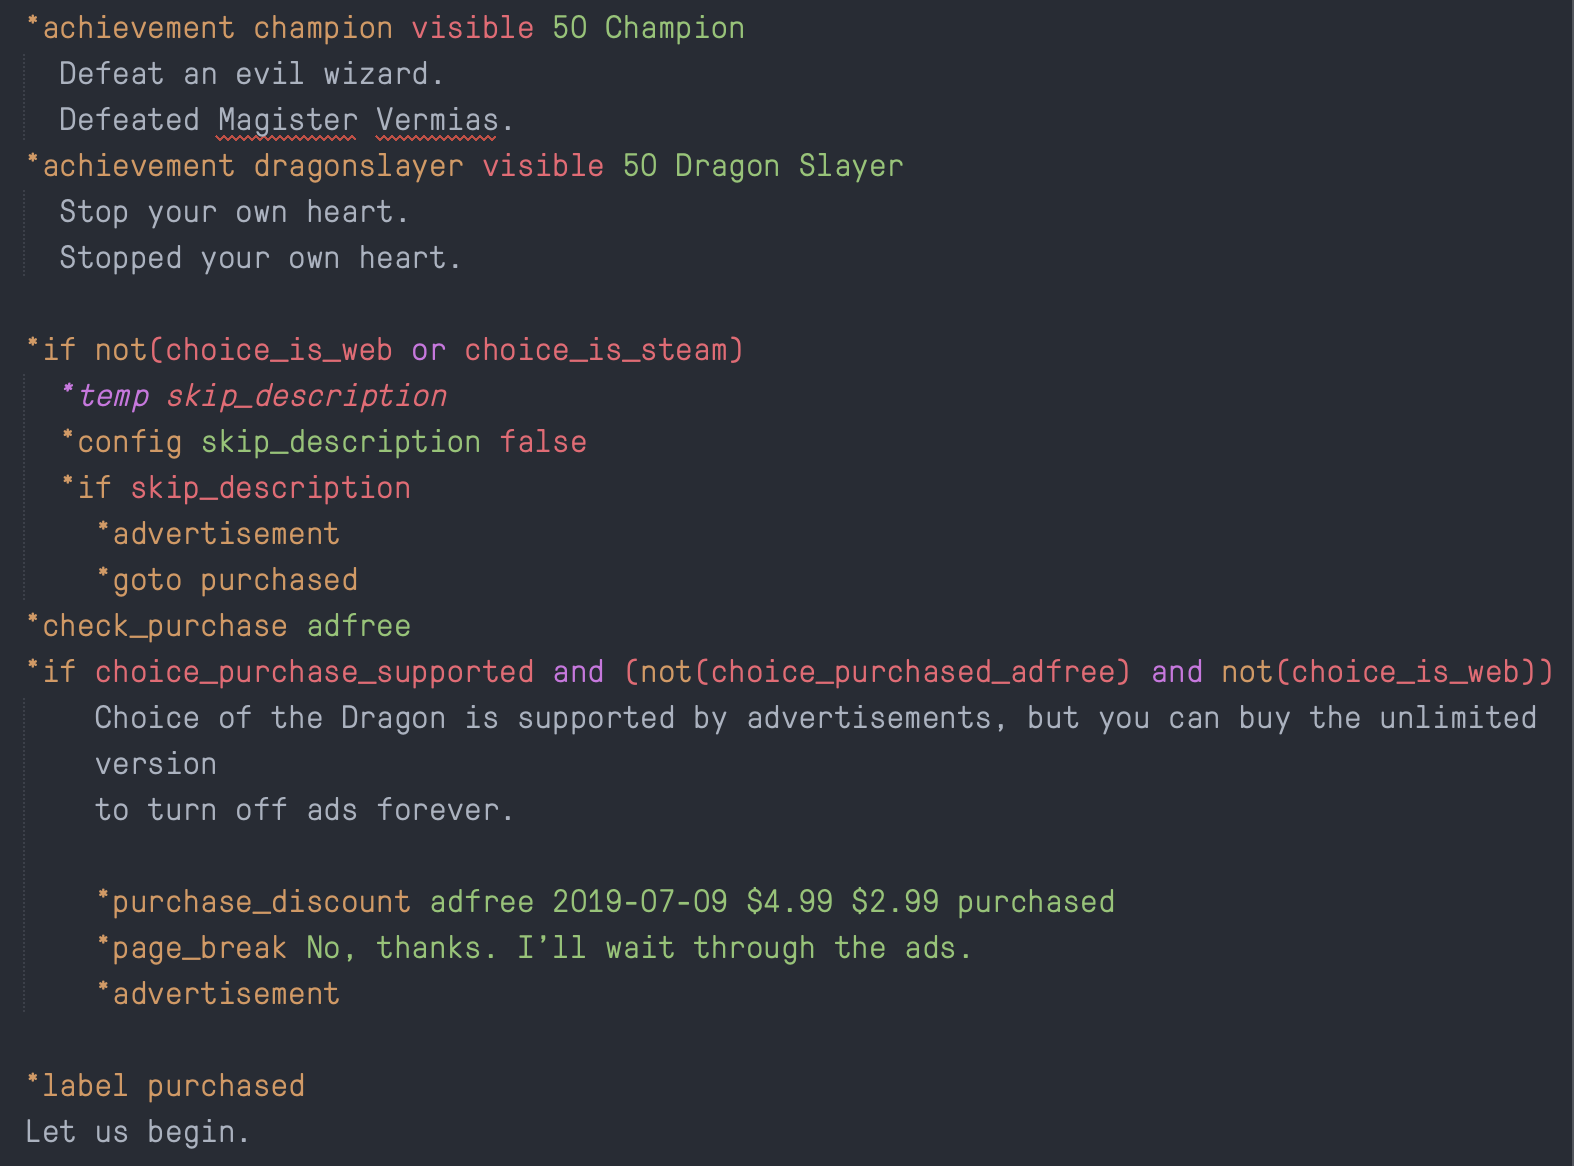
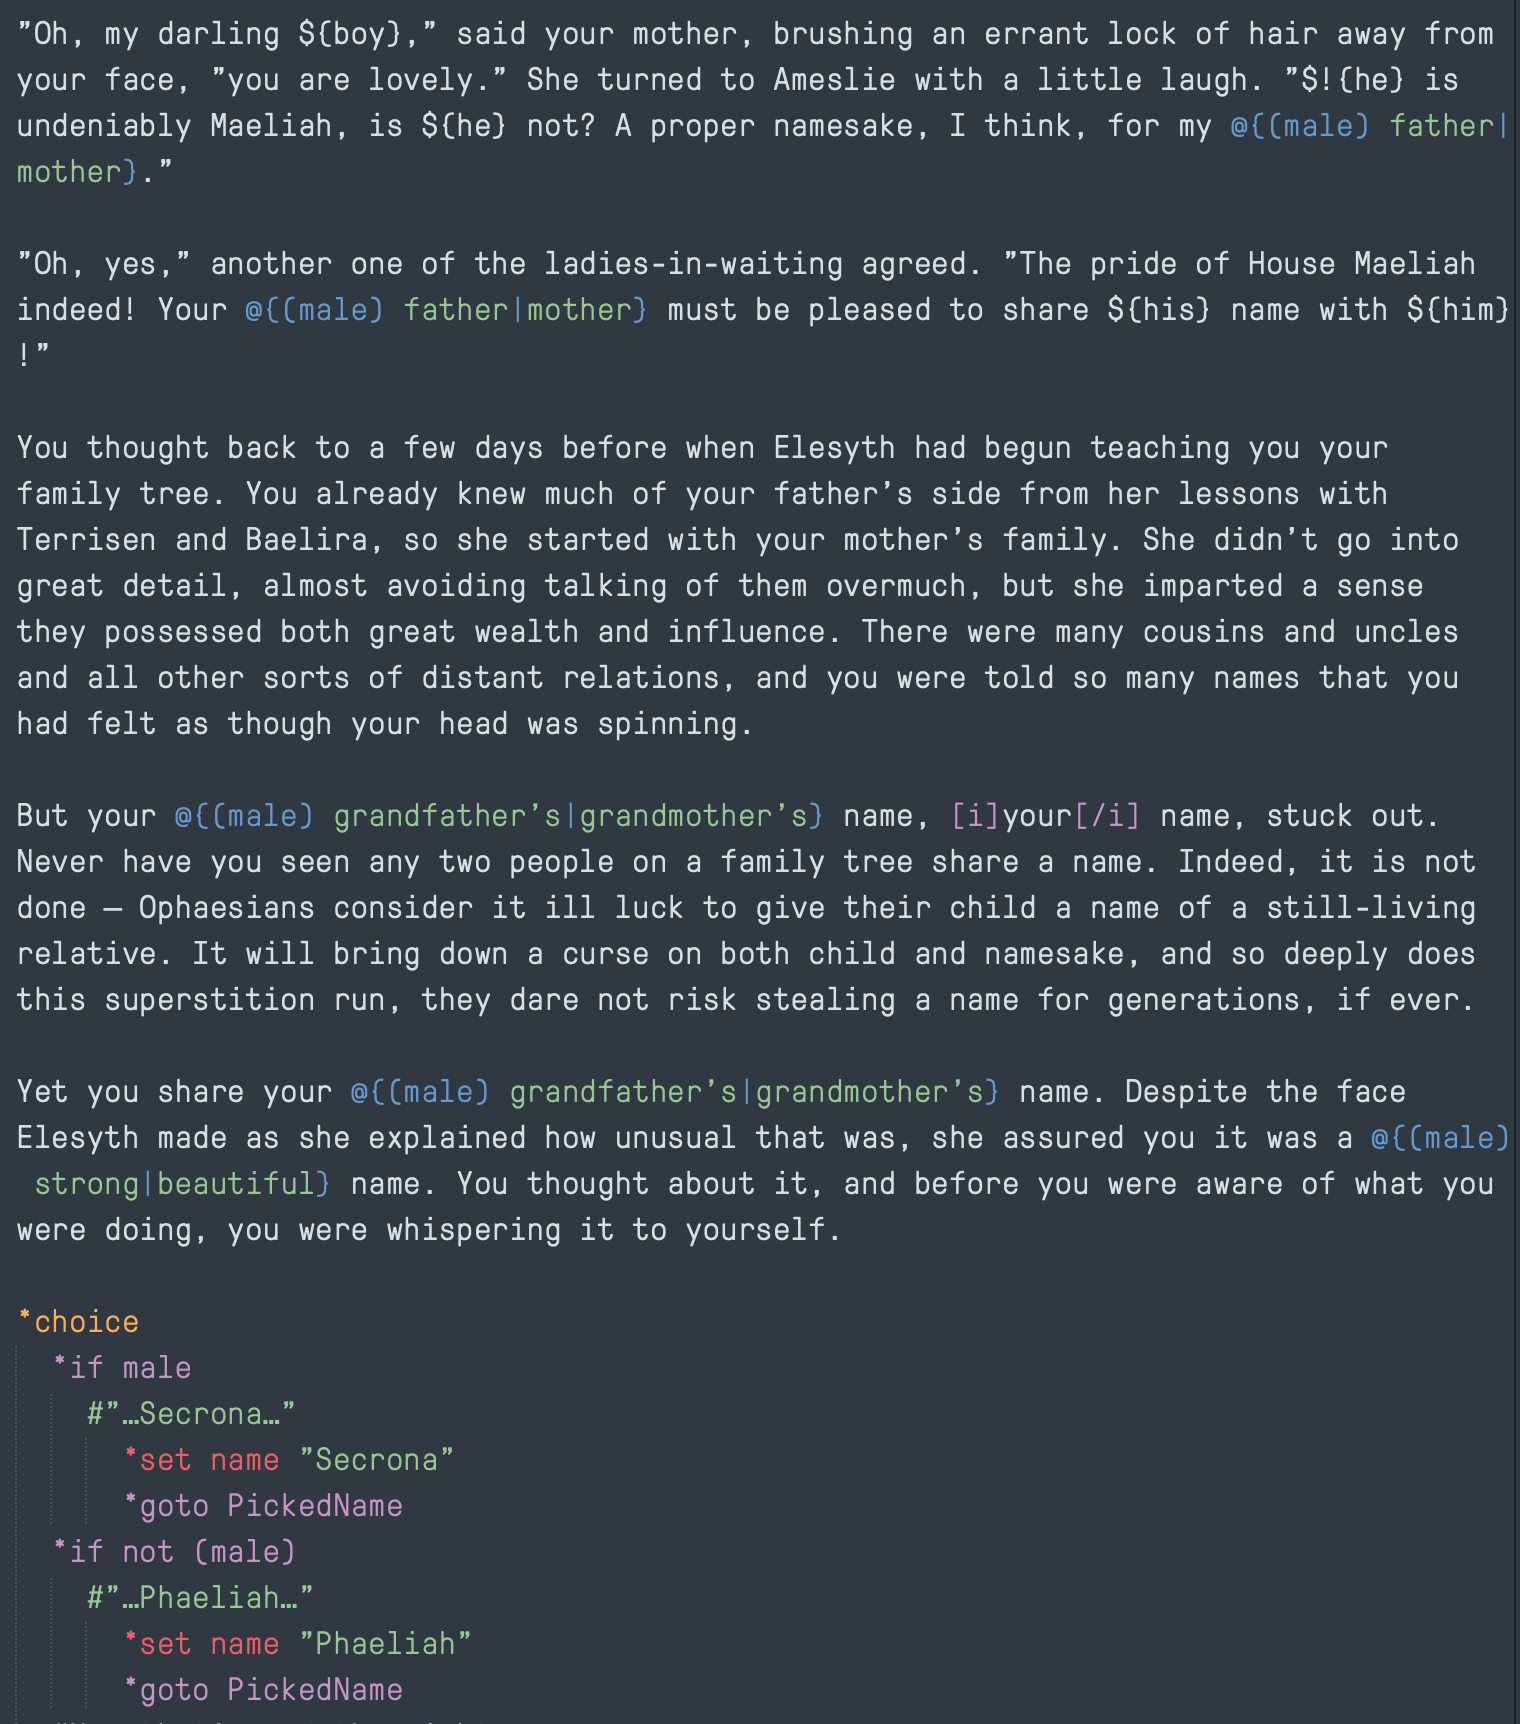
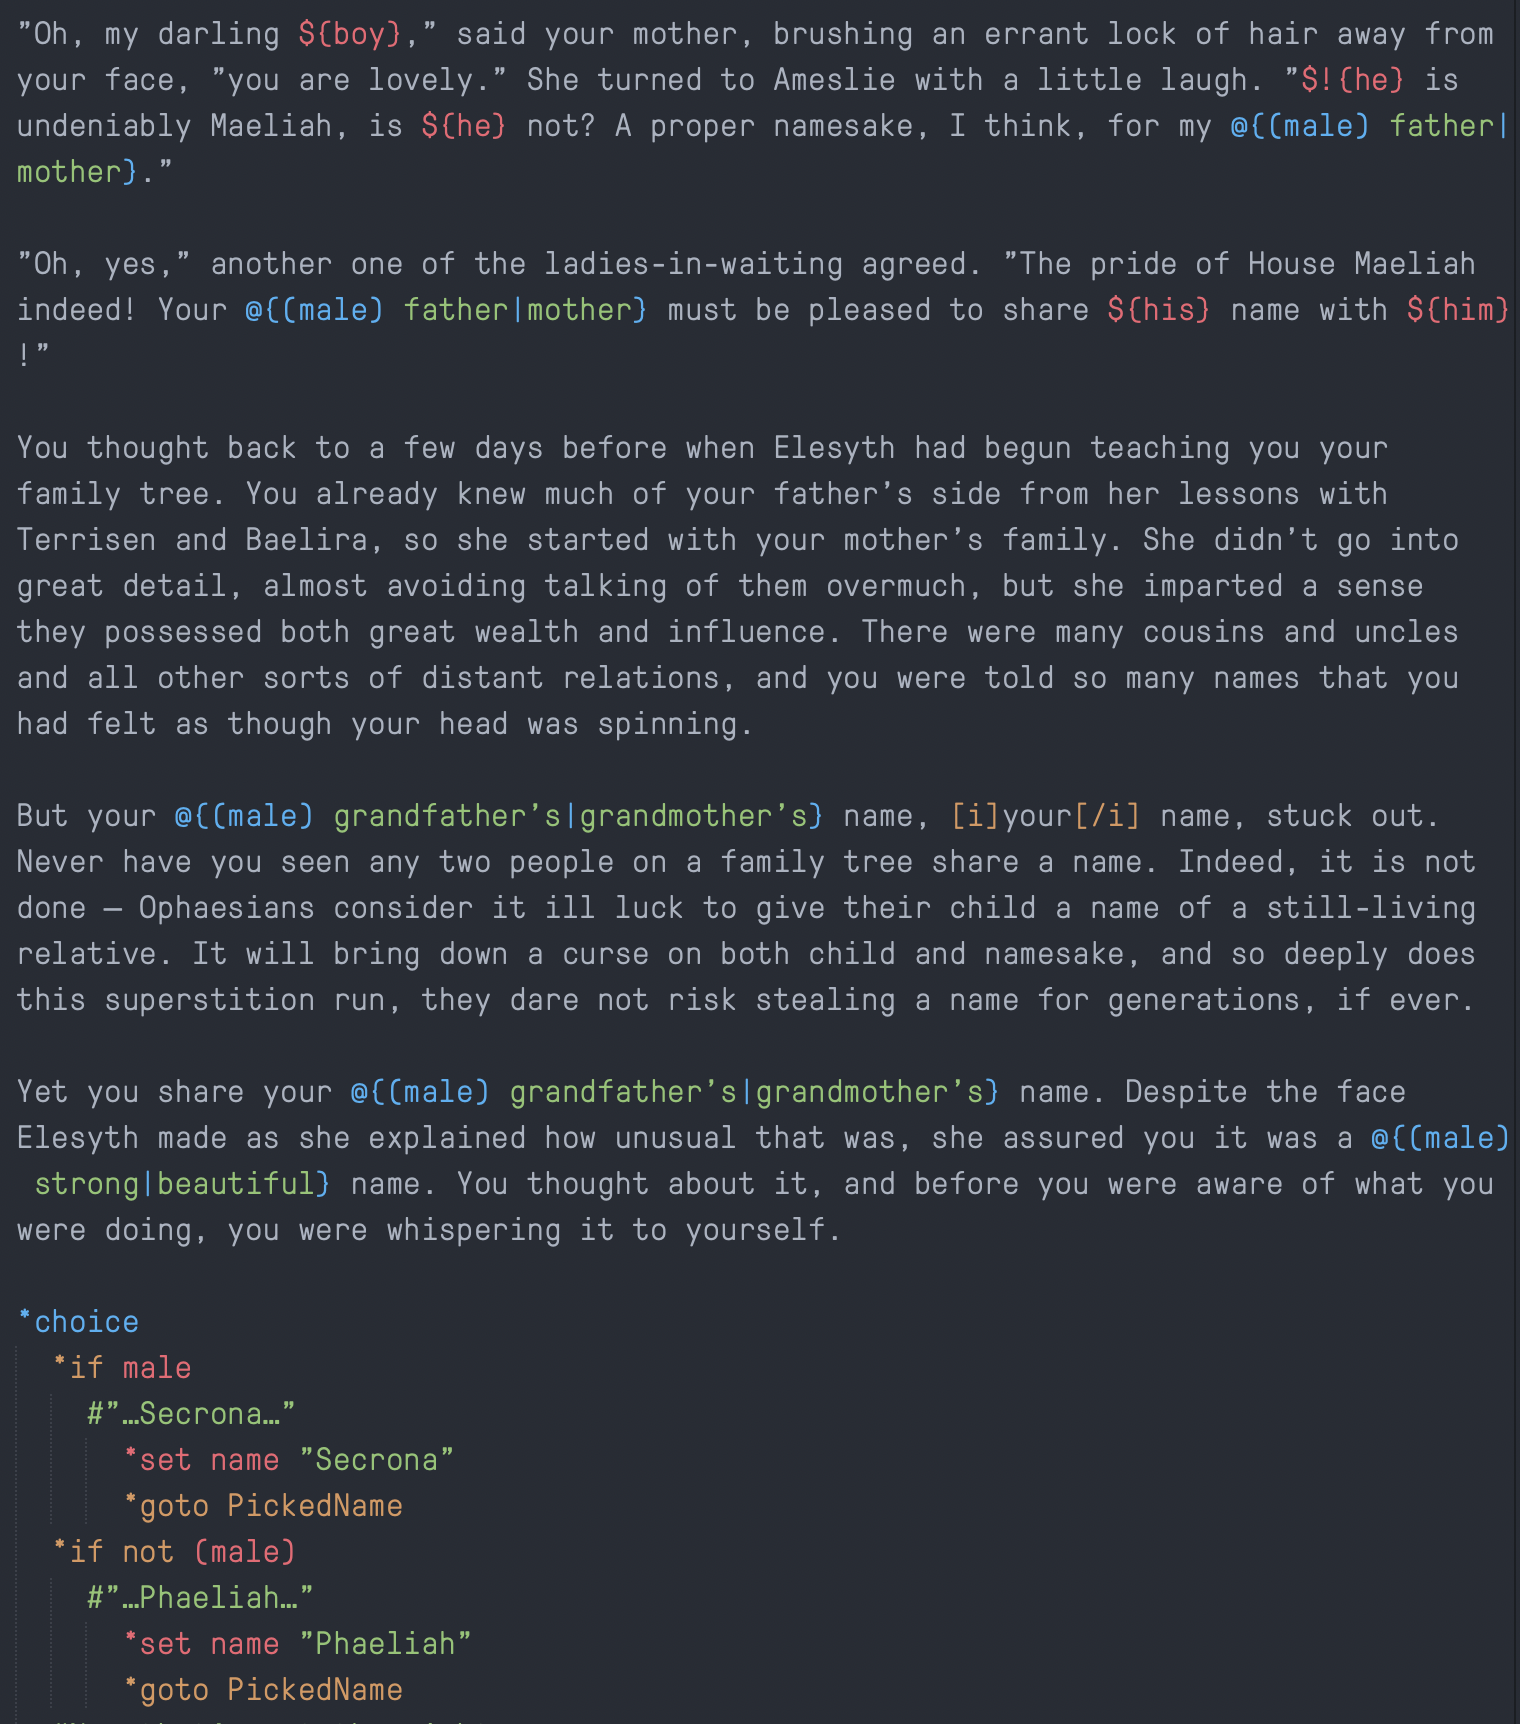
Screenshots
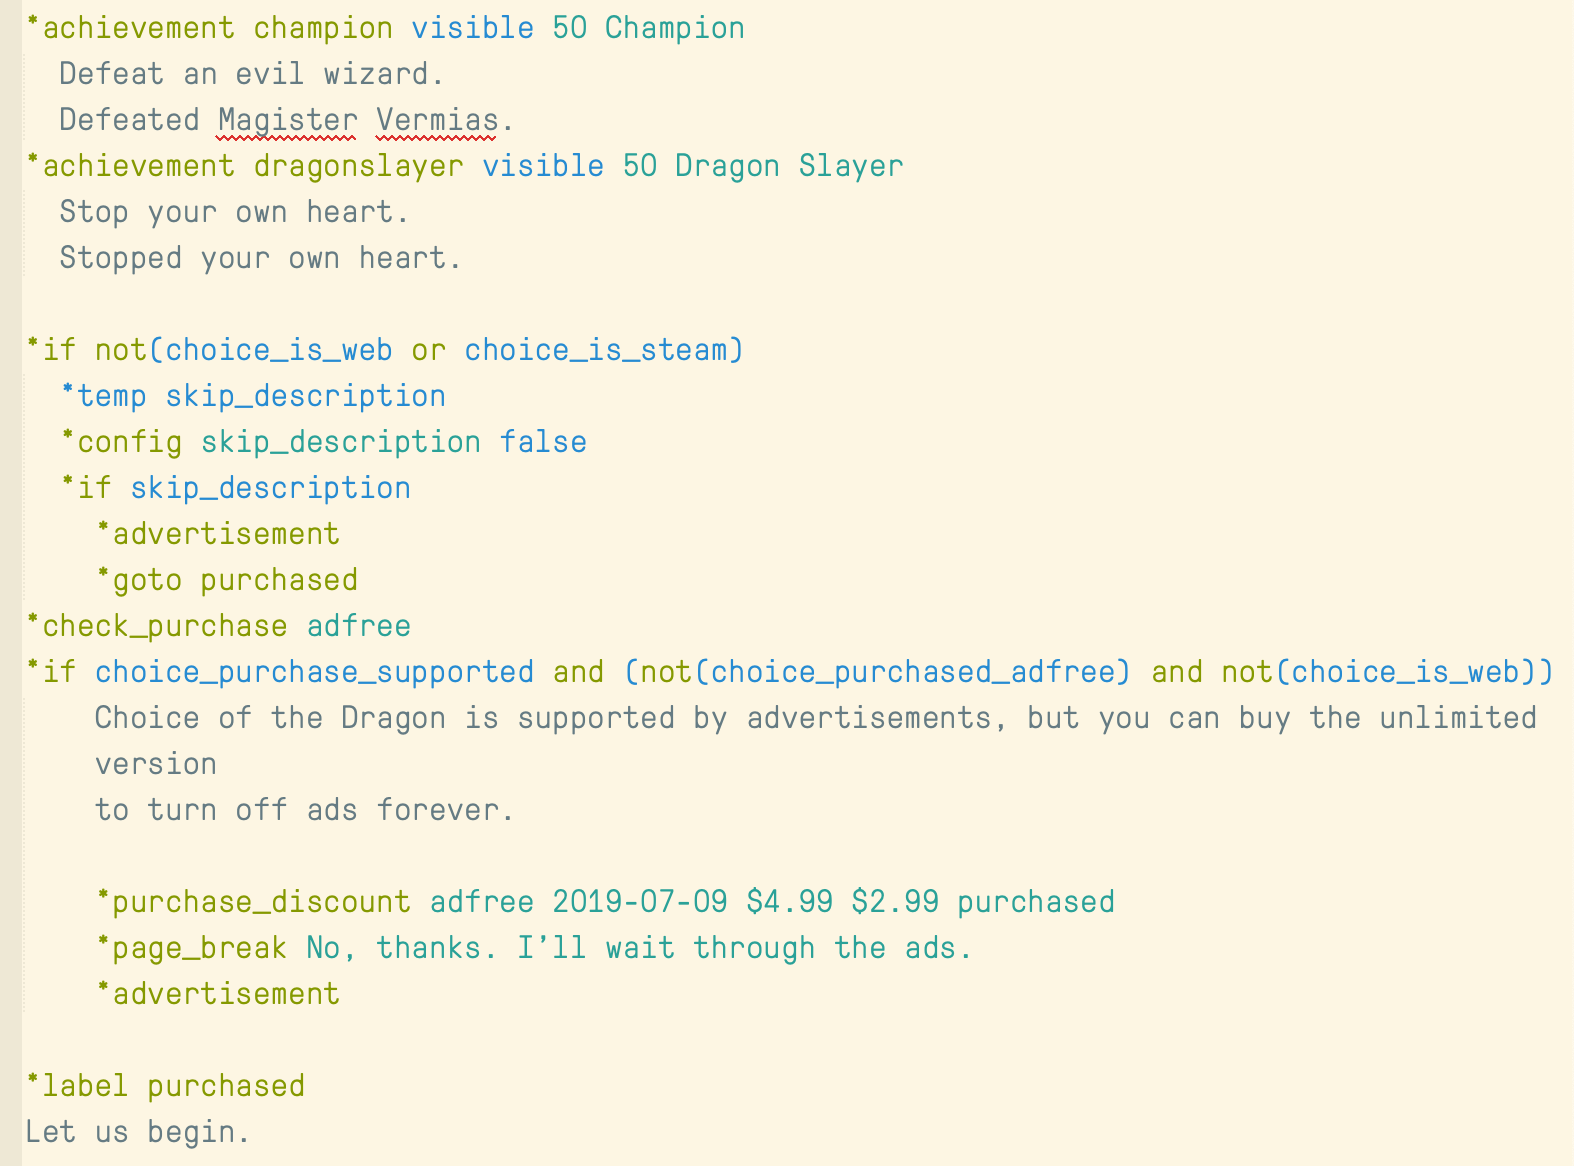
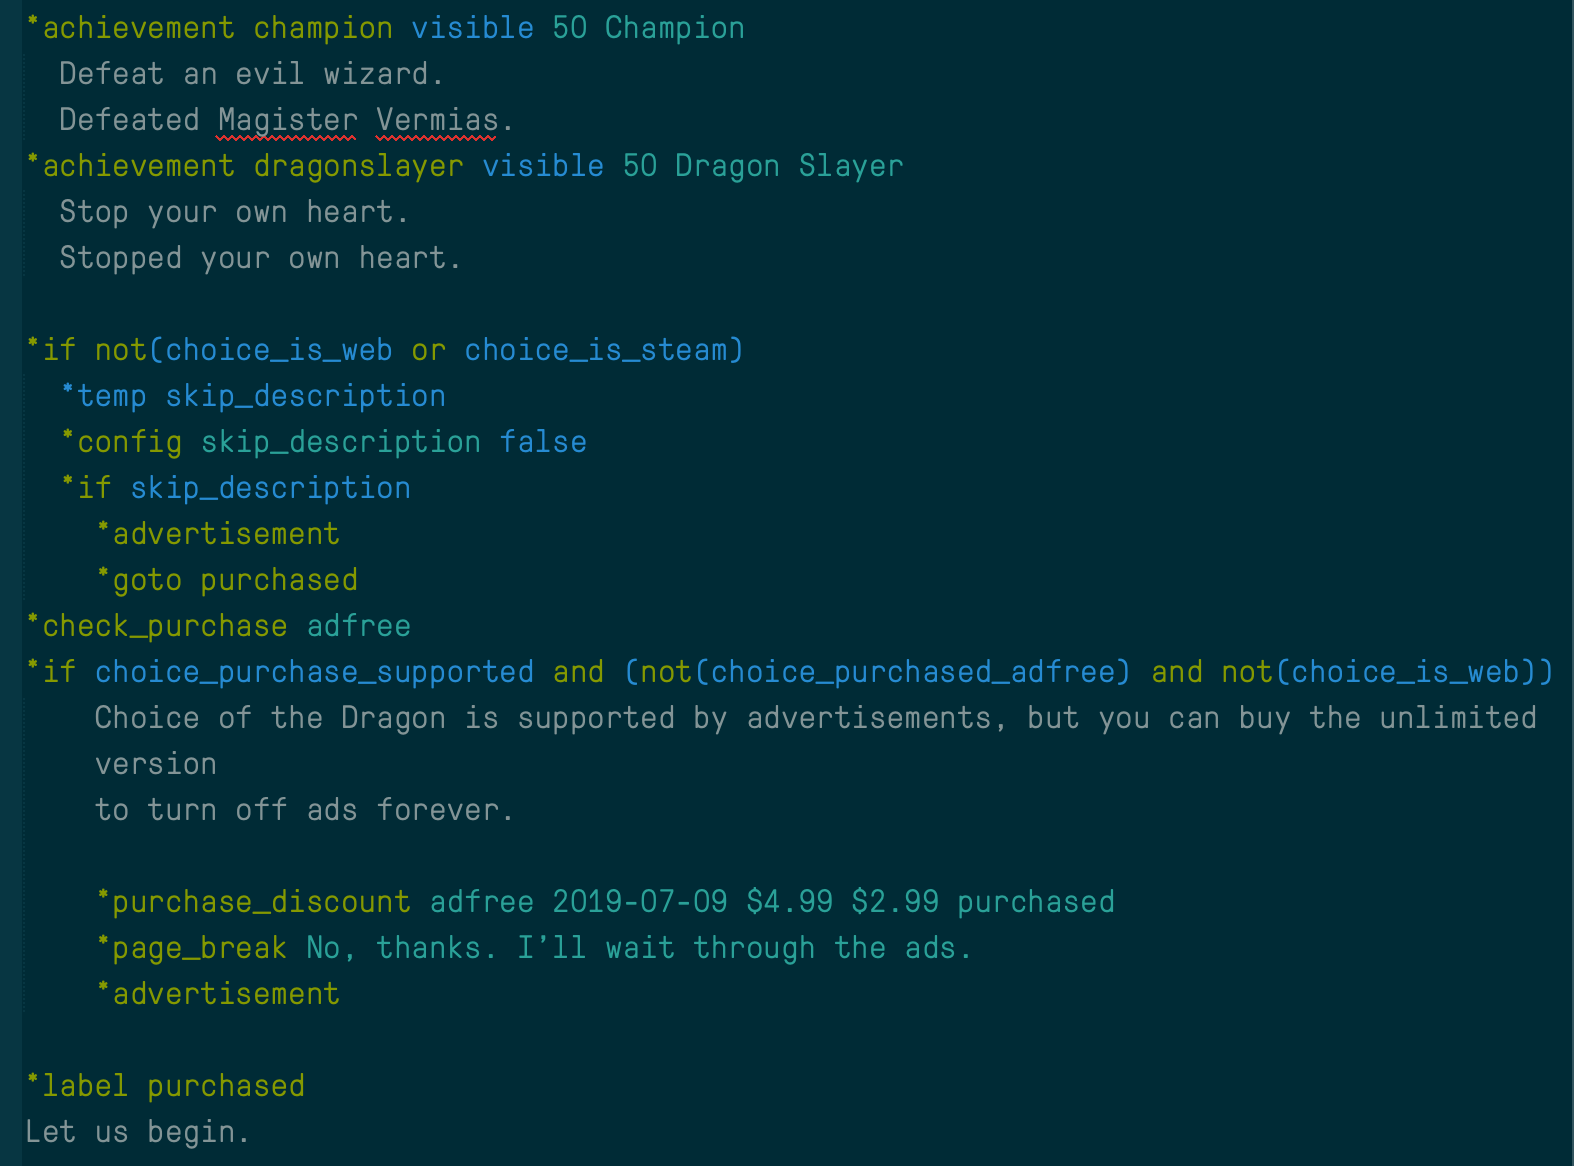
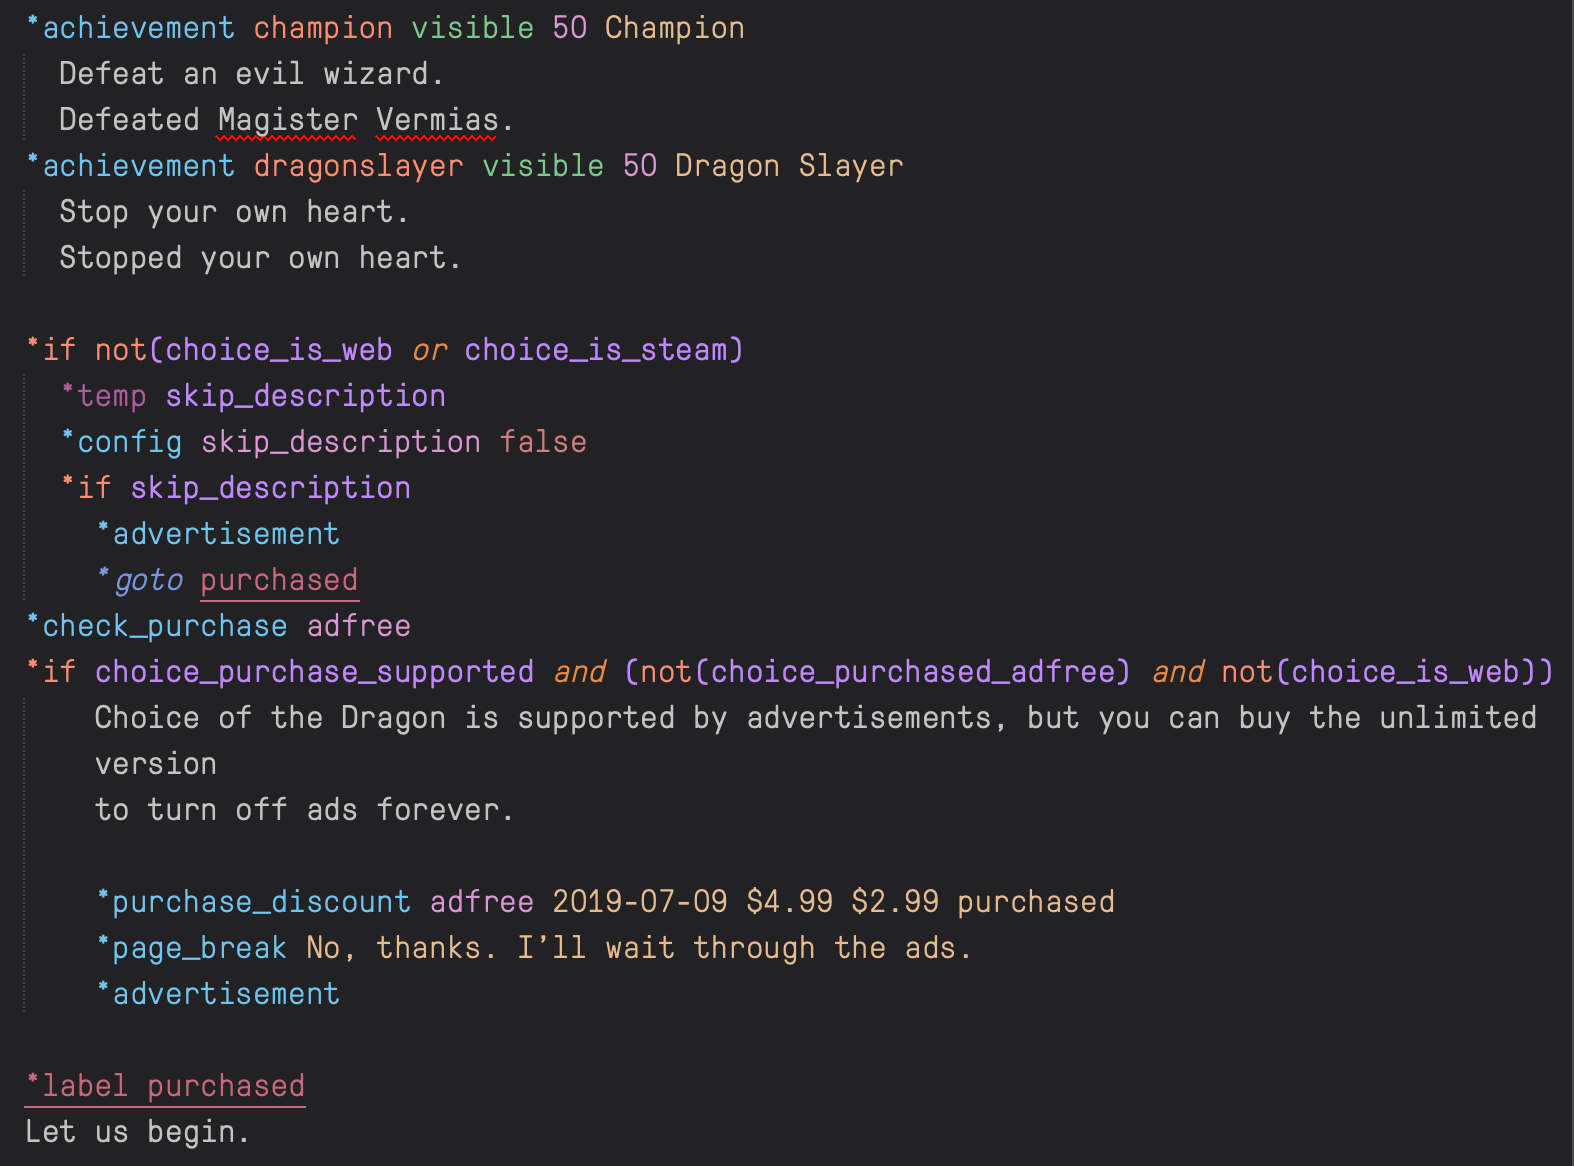
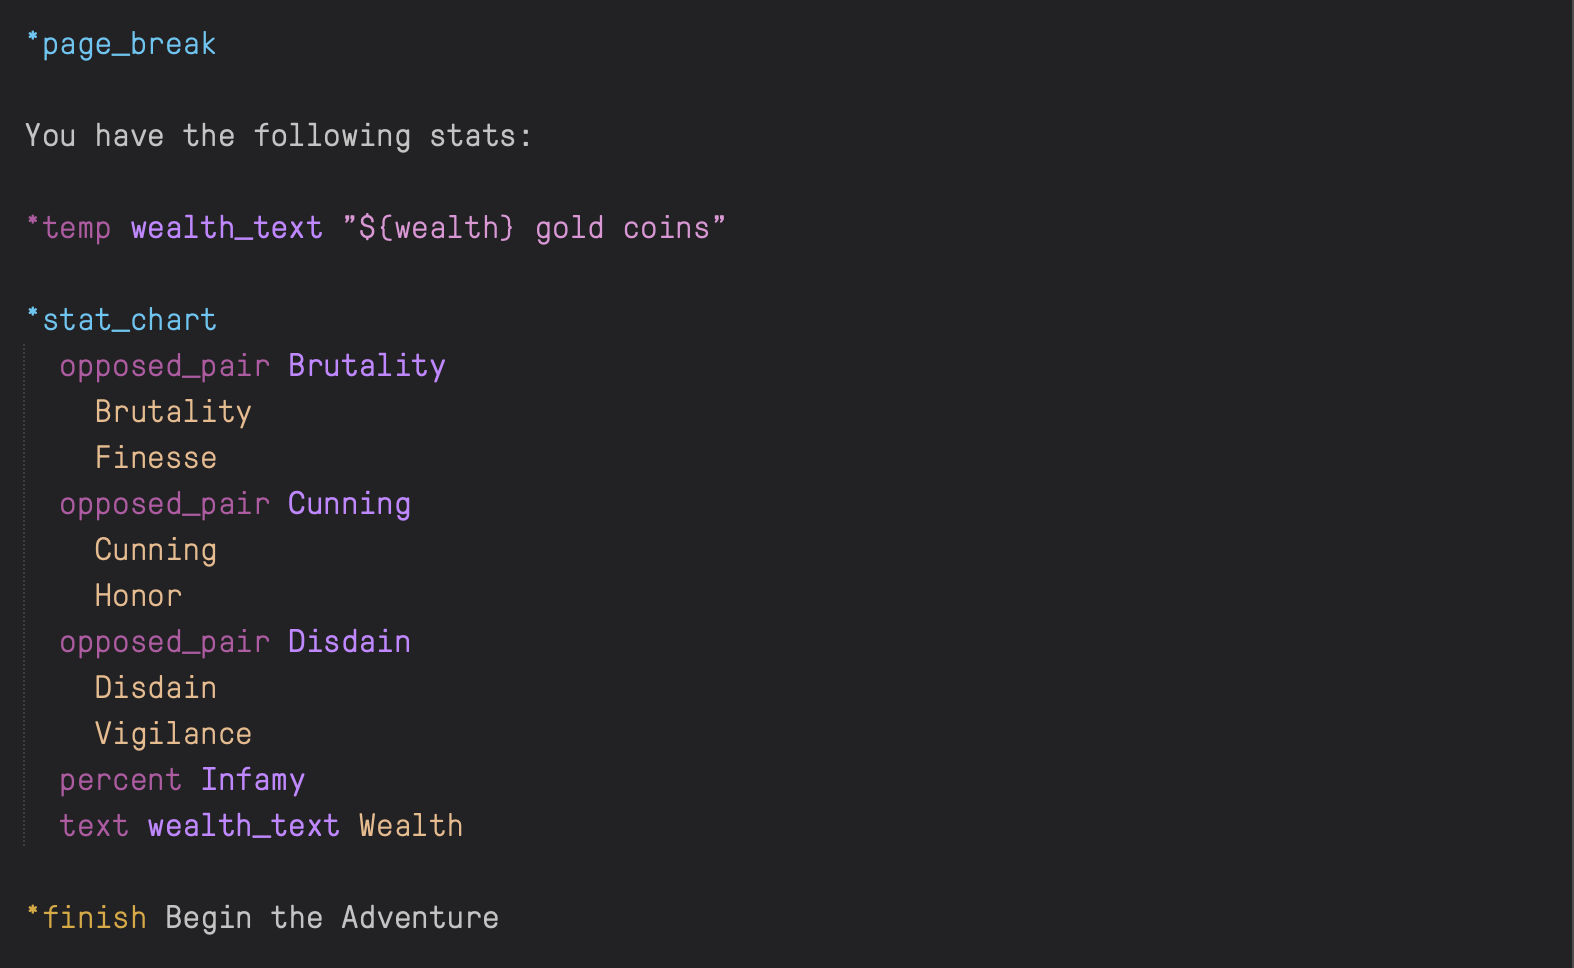
Below are screenshots of the syntax, with and without the color scheme, featuring scene files from Choice of Games' Choice of the Dragon and my own project.
✨ Without the Color Scheme
Click for full size.
| Sublime's Mariana | One Dark Gravity |
|---|---|
 |
 |
 |
 |
| Solarized Light | Solarized Dark |
|---|---|
 |
 |
 |
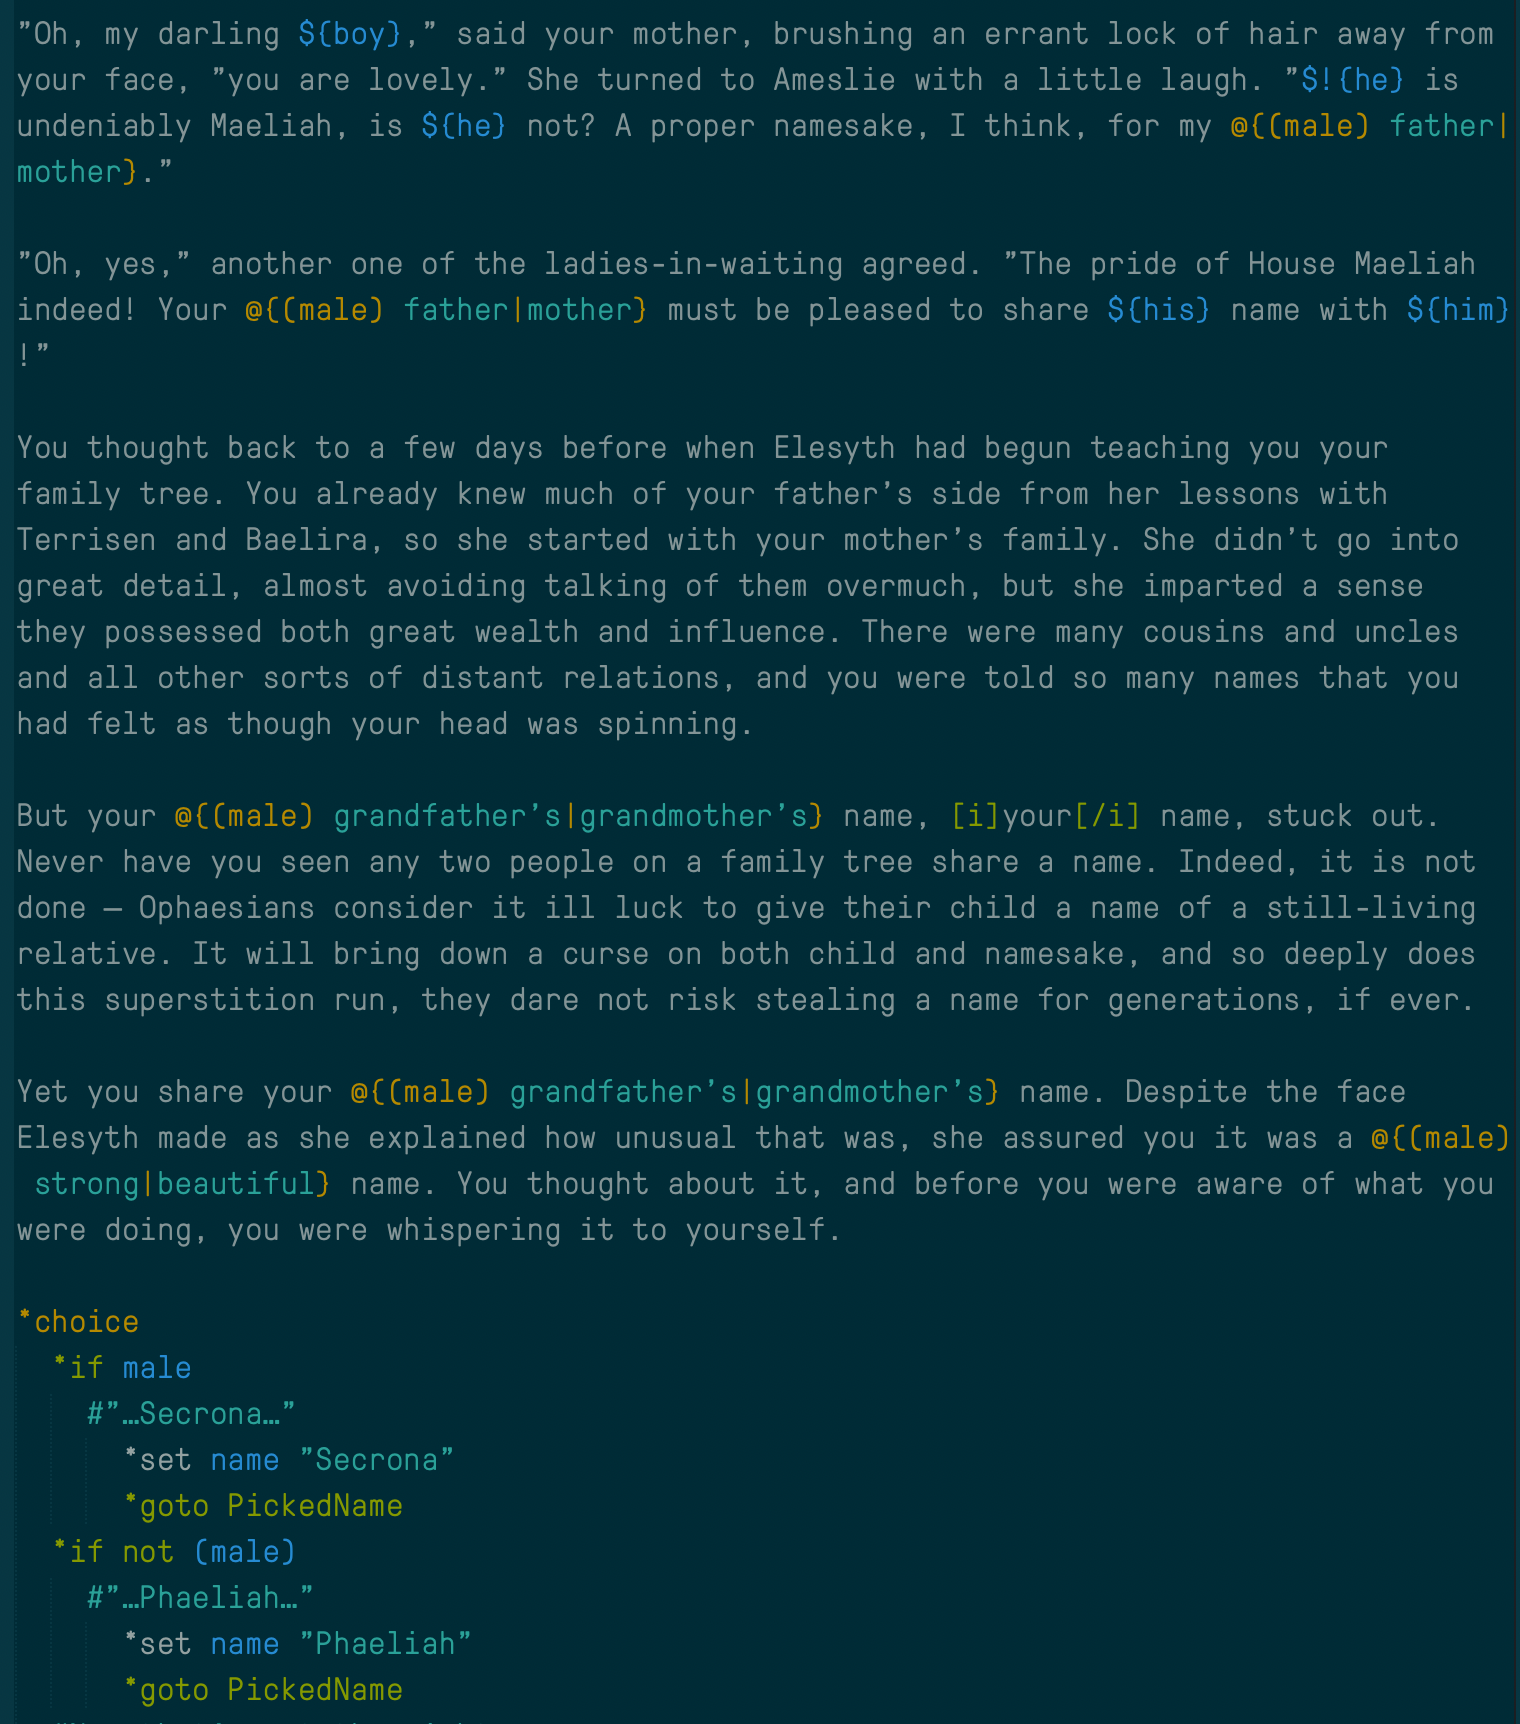 |
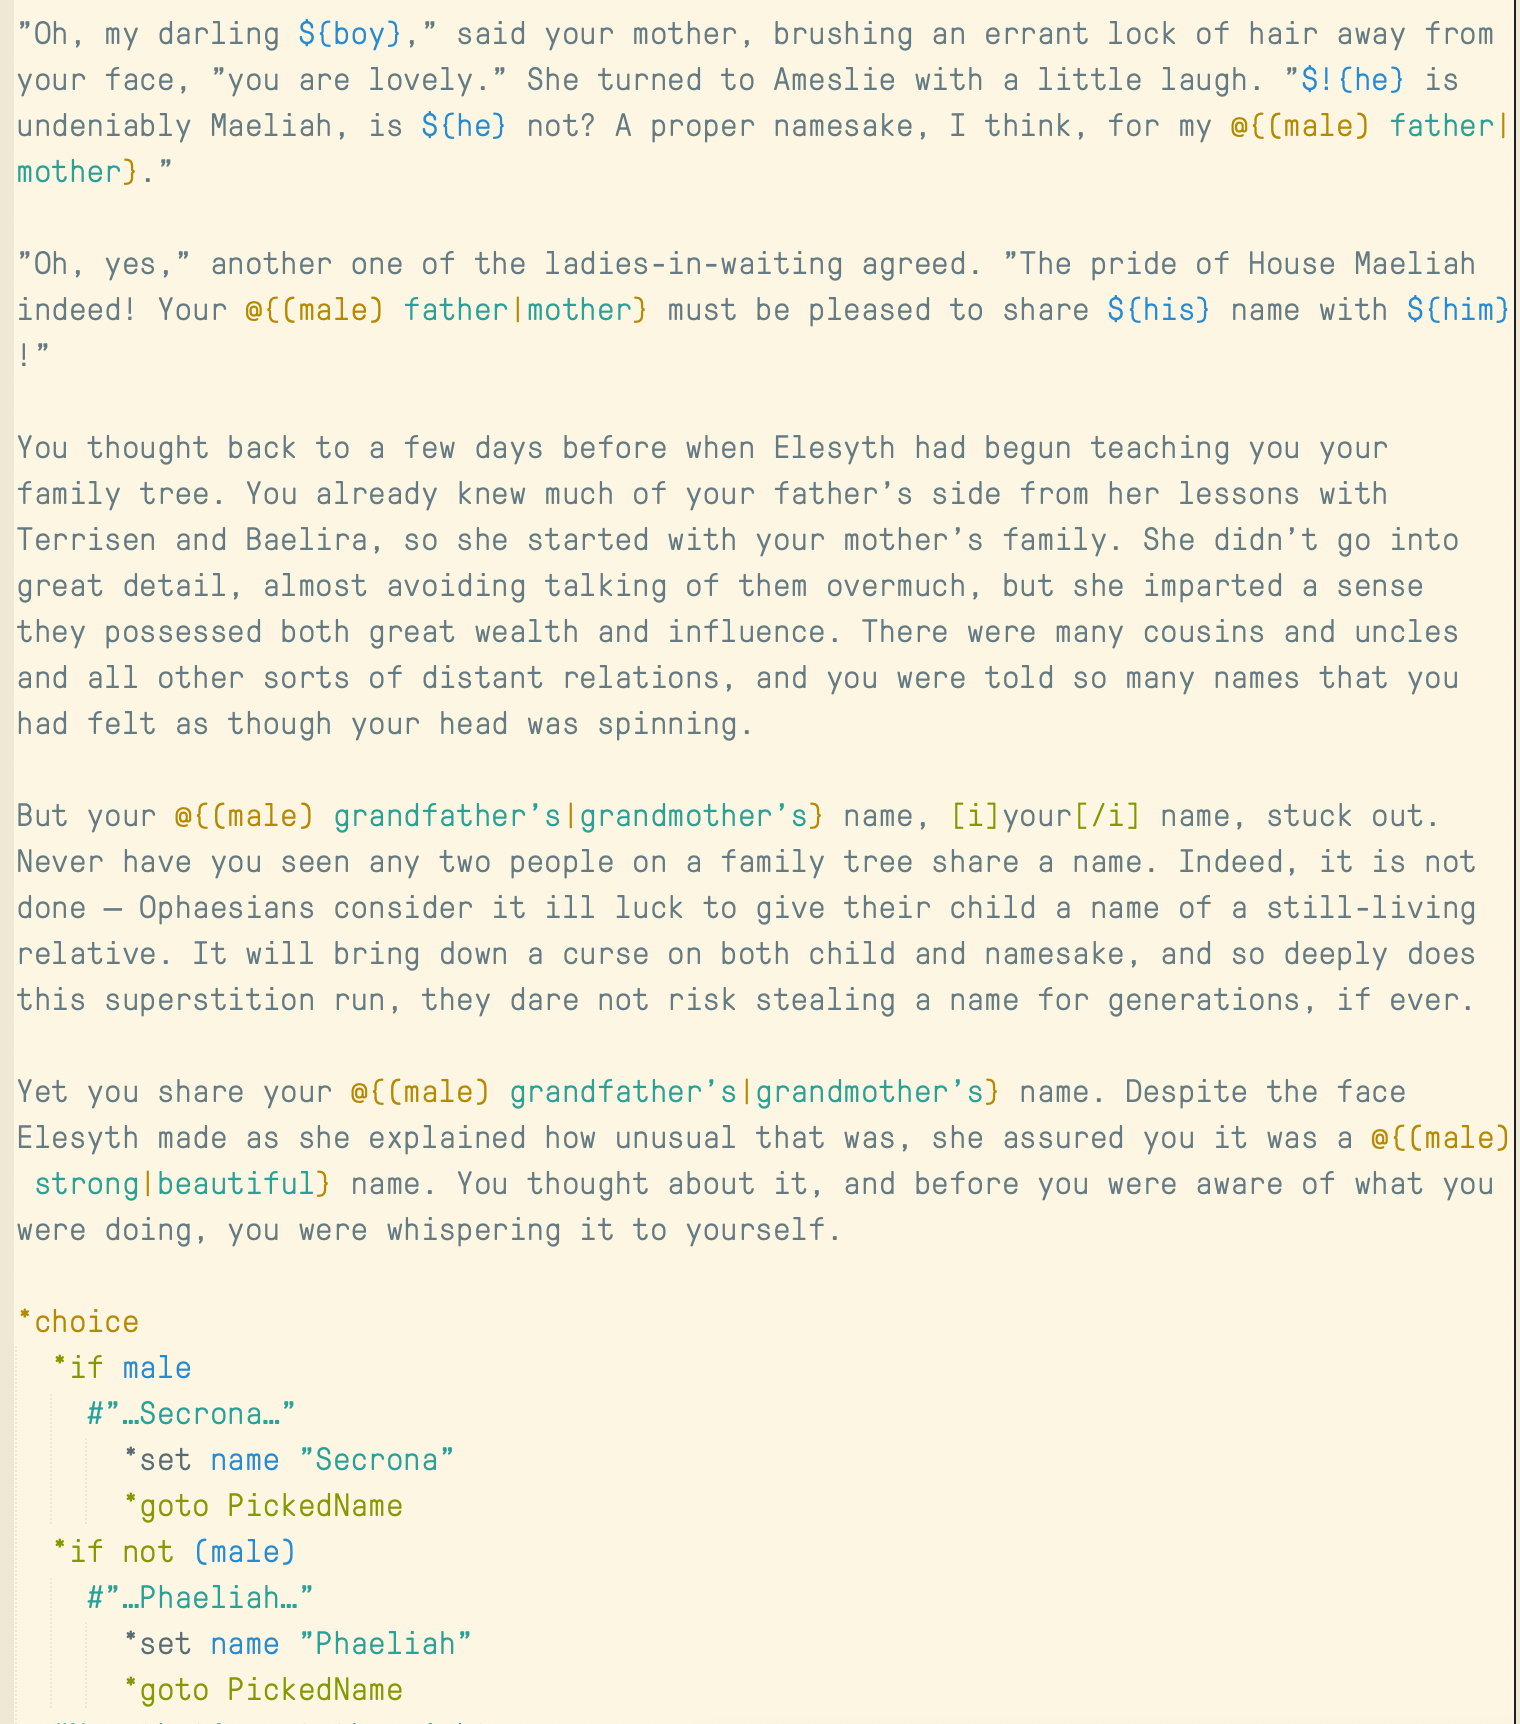
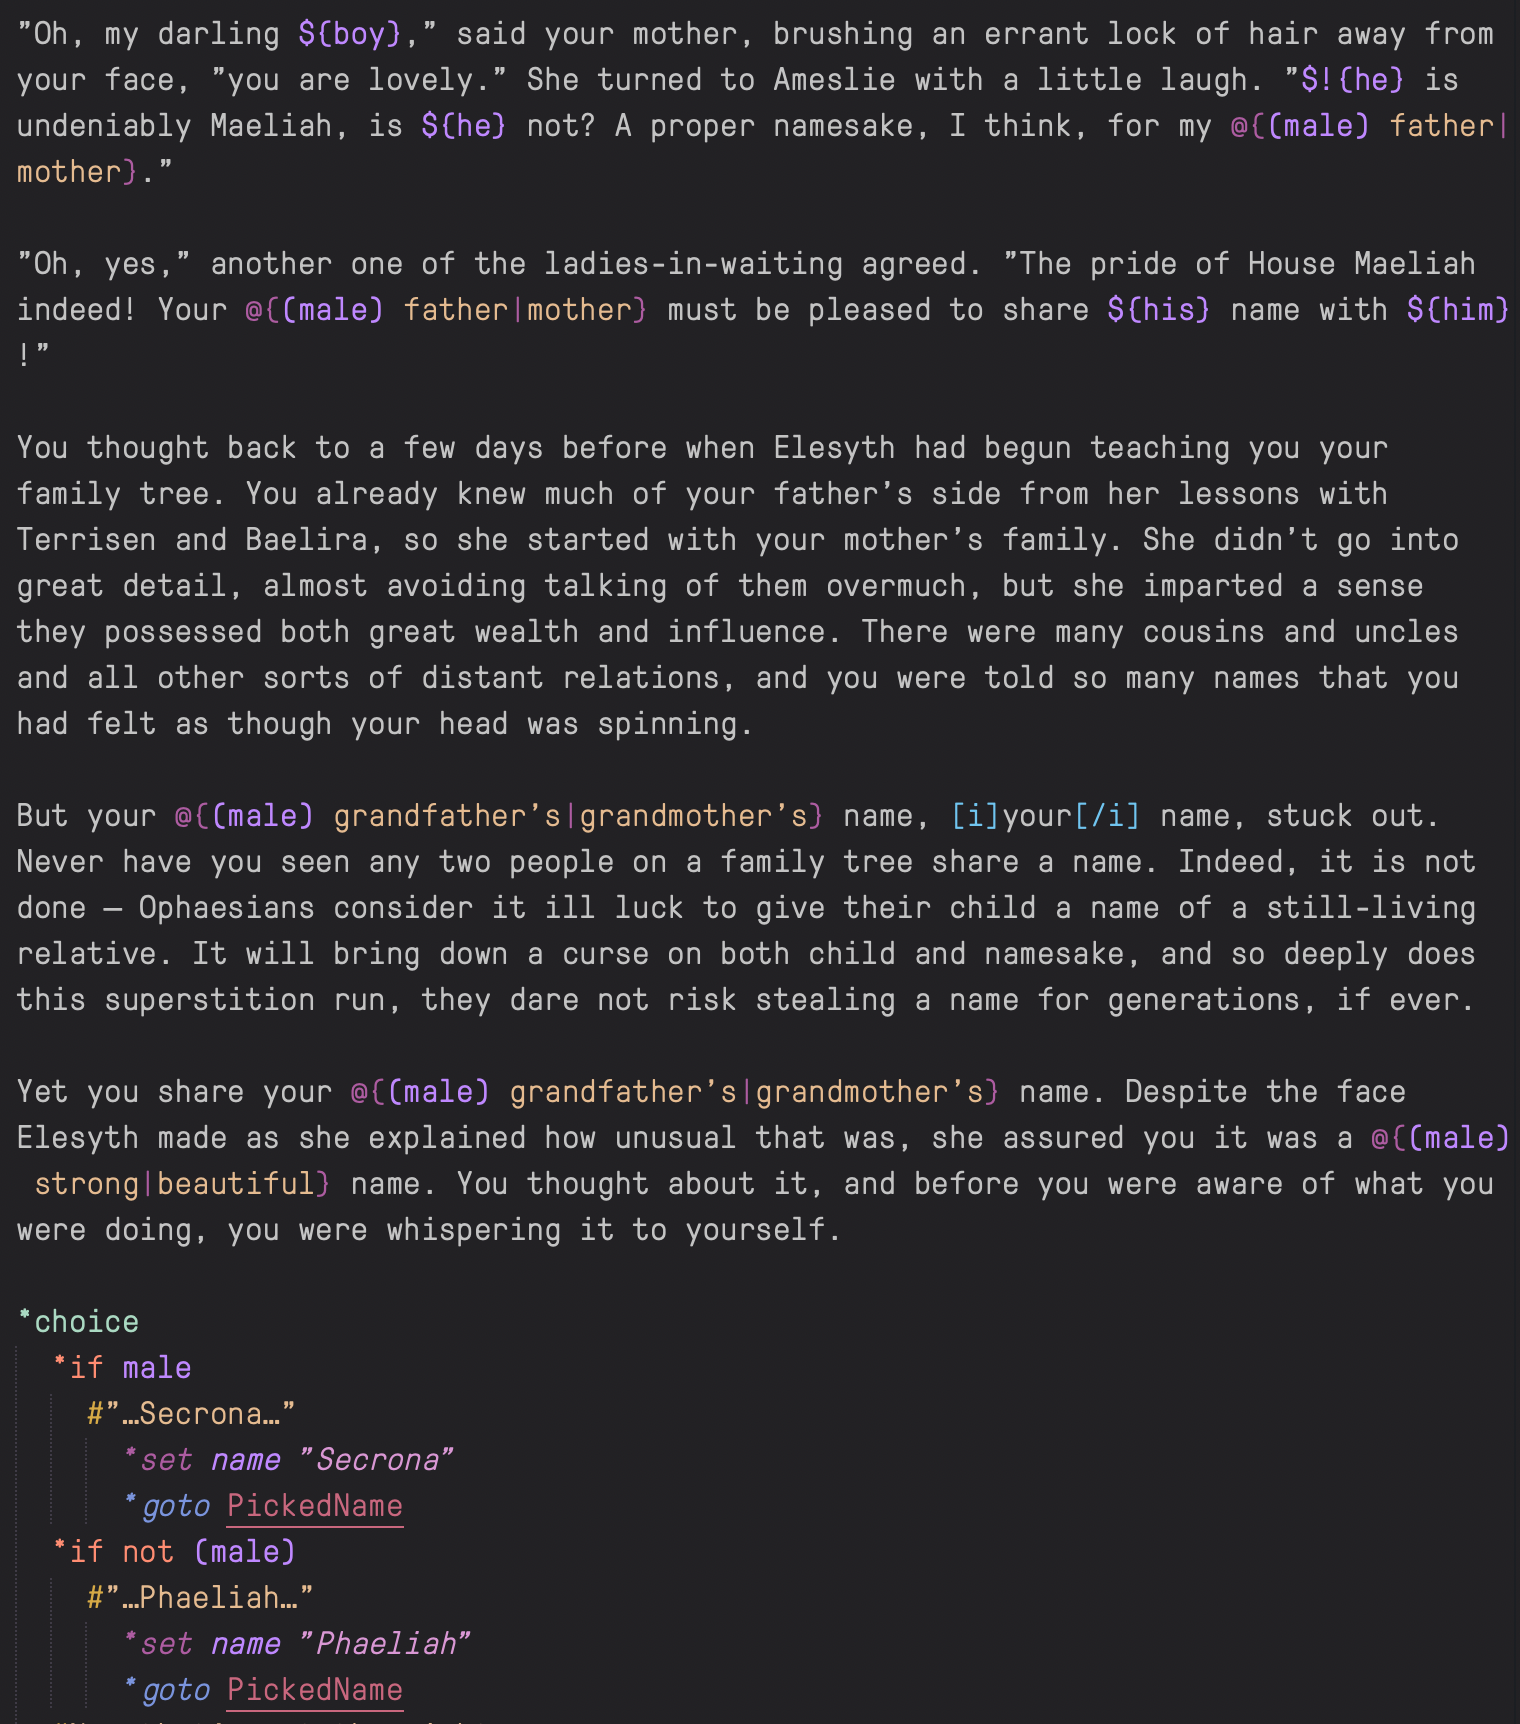
✨ With the Color Scheme
Click for full size.
| Choice of the Dragon | Choice of the Dragon | Multireplace Example |
|---|---|---|
 |
 |
 |
Autocomplete Commands
The syntax includes some autocomplete commands written in an attempt to help writers quickly write common lines of ChocieScript code.
❔ How to Use
All the autocomplete commands start with cs_ and must either be at the beginning of a new line or following a whitespace, such as a space or tab. Upon entering cs_, Sublime will list all the available autocomplete commands. For the most part, you will only need to type in one or two characters after cs_ for the right autocomplete. Sublime will commit to the autocomplete upon pressing enter or tab.
📋 List of Commands
| Function | Trigger | Completion |
|---|---|---|
| Choice | cs_ch |
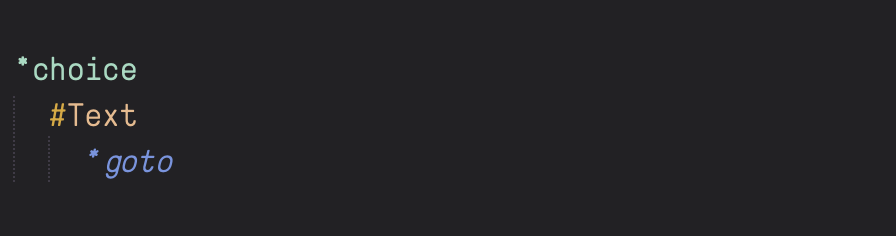 |
| Page Break | cs_pb |
 |
| Line Break | cs_lb |
 |
| Multireplace | cs_mr |
 |
| If/Else | cs_if |
 |
| Comment | cs_om |
 |
| Stat Chart | cs_st |
 |
| Horizontal Rule | cs_hr |
 |
| Implicit Control Flow | cs_imp |
 |
| Startup.txt Header | cs_header |
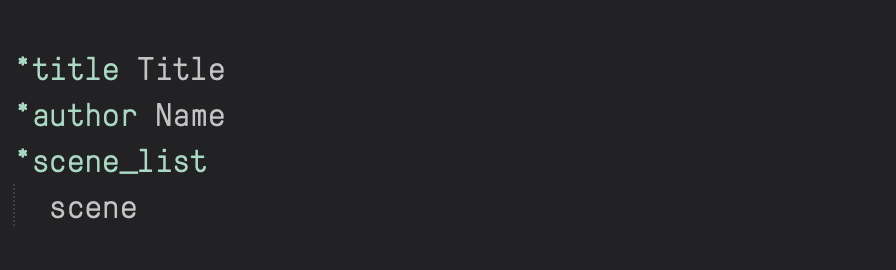 |
If need or desire ever arises, more autocomplete commands may be added in the future.
ChoiceScript Tips
These are some general quality of life tips for writing ChoiceScript, especially in Sublime.
Use Dropbox for your files! Dropbox is free and easy to access across every device and operating system. Keeping your ChoiceScript scene files in a Dropbox folder ensures that you will never lose your files, and because of its version history feature, it's easy to go back to an older version of your file if you've made a mistake.
Get a word count plugin for Sublime. This is easily done through Package Control. Simple open Command Palette, type in “WordCount” and install the top result. This will add a word count to the bottom left corner of the Sublime window. The plugin counts all words, including command lines, and you cannot quickly find out the total word count for a project without manually adding the word counts together.
Take advantage of columns and split view in Sublime. Sublime lets your open multiple columns (View > Layout), so you can view two files at once. These can be two separate files or the same file (split view). To use split view, go to File > Split View. You may need to adjust the layout, but it's very easy to do.
Use keybindings for em dashes and ellipsis. If you'd prefer your writing to use proper em dashes, “—”, or ellipsis, “…”, it is very easy to set Sublime up to automatically convert “–” and “…” for you using keybindings. Go to (MAC) Sublime Text > Preferences > Key Bindings OR (PC) Preferences > Key Bindings. A new window will pop up with two files. Copy and paste the following into the file on the right between the
[]brackets and save:
{ "keys": ["-", "-"], "command": "insert_snippet", "args": {"contents": "—"} },
    { "keys": [".", ".", "."], "command": "insert_snippet", "args": {"contents": "…"} },
Use CSIDE. Opting to use CSIDE instead of downloading the ChoiceScript folder from Github can make working with ChoiceScript easier. CSIDE has basic ChoiceScript syntax highlighting, a copy of ChoiceScript and its tests built into it, and has a good word count feature that excludes command lines and will look at the word count for your overall project – and it has a browser version, so you don't need to download anything. It also has a console, which you can read about in its documentation.
Use CSIDE and Sublime together. Writing code in Sublime and then using CSIDE to test and make immediate bug fixes is a solid way to develop ChoiceScript games. You get the benefits of Sublime – a more precise syntax highlighter and autocomplete commands – and the advantages of CSIDE, such as its console. Sublime will update with any saved changes you make in CSIDE. CSIDE does not update on its own, but it is very easy to reload scene files, either by right clicking on the file you wish to reload in the left sidebar or going to Project > Reload All Files.
In the event you make a mistake while saving in either program and accidentally lose anything, if you're storing your files on Dropbox, it's very easy to recover lost content using version history.
Editing and Customization
⚠️ This syntax definition and color scheme are provided under the MIT license.
This is a quick overview on how to edit and customize the syntax definition, its settings, and/or the color scheme, as well as how to create your own color scheme.
🎨 Color Scheme
🔹 Sublime 4
- (MAC) Sublime Text > Preferences > Customize Color Scheme. (PC) Preferences > Customize Color Scheme.
- This will open a new window. On the left is the ChoiceScript color scheme I made, and on the right is a blank
.sublime-color-schemefile. - Using the Sublime Documentation and my color scheme code as a guide, customize the color scheme as you like. I have tried to be as clear and thorough as possible with my comments to explain what affects which parts of the syntax.
- Save it to your
/Packages/Userfolder of your Sublime directory. Whatever changes you made will override my ChoiceScript color scheme.
Creating an entirely new color scheme follows a similar process. Ensure that your color scheme code includes a name – "name": "Your Color Scheme" – above "variables": {}.
🔸 Sublime 3
Editing a color scheme in Sublime 3 is not nearly as straight-forward as it is in Sublime 4. I recommend updating, but if you'd prefer not to, follow the instructions below.
- Ensure that you have at least downloaded the
ChoiceScript.sublime-color-schemefile via the Manual Installation option. - In Sublime, open
ChoiceScript.sublime-color-scheme. You can edit this file directly to make changes to the color scheme. - Using the Sublime Documentation and my color scheme code as a guide, customize the color scheme as you like. I have tried to be as clear and thorough as possible with my comments to explain what affects which parts of the syntax.
- Save, either as a new file with the
.sublime-color-schemeextension in the/Packages/Userfolder of your Sublime directly or simply save it asChoiceScript.sublime-color-schemeto completely overwrite my color scheme.
Creating an entirely new color scheme is an almost indentical process. Simply save it as an entirely new file with a different name and ensure that the code includes a name – "name": "Your Color Scheme" – above "variables": {}.
⚙️ Syntax-Specific Settings
Modifying syntax-specific settings in Sublime is very easy.
- (MAC) Sublime Text > Preferences > Settings - Syntax Specific. (PC) Preferences > Settings - Syntax Specific.
- A new window will open will two files. One the left is a read-only file that list all possible settings you can modify and their default value in Sublime. On the right is a new syntax-specific settings file that will override all other settings, including the ones I have set for
ChoiceScript.sublime-settings. - Using the file on the left as a guide, write your new settings for the ChoiceScript syntax.
- Save.
Alternatively, if you have downloaded the ChoiceScript.sublime-settings files via Manual Installation, you can edit the settings I've set directly. I have included comments in the files for that purpose.
Below are the settings I've set for the ChoiceScript syntax:
{
        // remove or comment out to disable
        // if you want to use your default scheme
        // or one of the other choicescript schemes
    //"color_scheme": "Packages/User/ChoiceScript.sublime-color-scheme",

        // change to false to disable entirely
    "auto_complete": true,

        // scope for cs_ command autocompletes
    "auto_complete_selector": "keyword.trigger",

        // change to false to disable entirely
    "spell_check": true,

        // so it only spell checks plain text and
        // text in multireplace and choice options
    "spelling_selector": "string.text, -(comment, entity, keyword, variable, storage)",

        // general quality of life and compatibility
        // stuff so your code works in other editors
    "word_wrap": true,
    "tab_size": 2,
    "detect_indentation": true,
    "auto_indent": true,
    "smart_indent": true,
    "use_tab_stops": true,
    "translate_tabs_to_spaces": true,
    "margin": 7,

        // makes the caret blink
    "caret_style": "blink",

        // lets you scroll past the last line in a
        // file to making writing final lines more
        // comfortable
    "scroll_past_end": true,

        // disabled so it doesn't match quotes
    "auto_match_enabled": false,
}
📝 Syntax Definition
Like all syntax definitions in Sublime 3 and beyond, the ChoiceScript syntax definition uses YAML, which is remarkably straight forward and intuitive, and RegEx (regular expression) which is less so. I'm not going in-depth on how to write in regular expression or how to write a new syntax definition, but I'll briefly go over how you can edit my syntax definition or create your own and link to some resources.
- Ensure that you have at least downloaded the
ChoiceScript.sublime-syntaxfile via the Manual Installation option. - In Sublime, open
ChoiceScript.sublime-syntax. You can edit this file directly to modify the syntax definition. - Using the Sublime Documentation and Oniguruma Regular Expressions, modify the syntax definition as you please.
Note: This is my first syntax definition. I have probably done a lot wrong, I'm sure, so I don't recommend using my syntax definition as a guide on how syntax definitions are supposed to look/work.
- Save, either as a new file with the
.sublime-color-schemeextension in the/Packages/Userfolder of your Sublime directory or simply save it asChoiceScript.sublime-syntaxto completely overwrite my syntax definition.
Creating an entirely new syntax definition is very easy. Go to Tools > Developer > New Syntax… and Sublime will open a new file set up for a syntax definition.
I found the Oniguruma Regular Expression Document difficult to understand as I had no prior knowledge of regular expression. I found this cheatsheet helpful, though it is meant for JavaScript and not necessarily Sublime syntax definitions. Referencing both is the best route, but at the end of the day, the best way to figure it out is trial and error.
Contact Me
If you need to contact me directly for any reason relating to the ChoiceScript syntax, you can do so.
Discord: Fawkes#4253
COG Forum: Fawkes
Tumblr: @fantasyfawkes
Disclaimer
This syntax highlighter is in no way affiliated with or endorsed by Choice of Games, LLC. It is indepedently created and maintained by Fawkes (E.S. Fawkes) as an aid for writers.
ChoiceScript is © D. Fabulich.