GeminiCLI
interactive google Gemini CLI interface for Sublime Text with file-context and agentic coding support
Details
Installs
- Total 445
- Win 227
- Mac 102
- Linux 116
| Jul 23 | Jul 22 | Jul 21 | Jul 20 | Jul 19 | Jul 18 | Jul 17 | Jul 16 | Jul 15 | Jul 14 | Jul 13 | Jul 12 | Jul 11 | Jul 10 | Jul 9 | Jul 8 | Jul 7 | Jul 6 | Jul 5 | Jul 4 | Jul 3 | Jul 2 | Jul 1 | Jun 30 | Jun 29 | Jun 28 | Jun 27 | Jun 26 | Jun 25 | Jun 24 | Jun 23 | Jun 22 | Jun 21 | Jun 20 | Jun 19 | Jun 18 | Jun 17 | Jun 16 | Jun 15 | Jun 14 | Jun 13 | Jun 12 | Jun 11 | Jun 10 | Jun 9 | Jun 8 | |
|---|---|---|---|---|---|---|---|---|---|---|---|---|---|---|---|---|---|---|---|---|---|---|---|---|---|---|---|---|---|---|---|---|---|---|---|---|---|---|---|---|---|---|---|---|---|---|
| Windows | 0 | 1 | 0 | 2 | 1 | 0 | 3 | 3 | 0 | 5 | 3 | 0 | 2 | 1 | 2 | 1 | 1 | 0 | 0 | 1 | 5 | 5 | 2 | 3 | 1 | 0 | 2 | 4 | 1 | 4 | 5 | 6 | 2 | 1 | 1 | 3 | 4 | 3 | 2 | 0 | 4 | 6 | 2 | 3 | 1 | 0 |
| Mac | 0 | 0 | 1 | 0 | 1 | 0 | 0 | 1 | 0 | 0 | 2 | 1 | 0 | 0 | 0 | 0 | 2 | 0 | 0 | 0 | 0 | 2 | 0 | 0 | 2 | 0 | 1 | 0 | 0 | 0 | 3 | 2 | 2 | 0 | 1 | 0 | 0 | 3 | 1 | 0 | 0 | 1 | 1 | 7 | 1 | 2 |
| Linux | 0 | 2 | 2 | 1 | 0 | 0 | 0 | 1 | 0 | 3 | 0 | 0 | 1 | 1 | 4 | 1 | 0 | 1 | 2 | 1 | 2 | 2 | 1 | 0 | 1 | 2 | 1 | 0 | 5 | 0 | 0 | 0 | 0 | 0 | 1 | 0 | 2 | 1 | 1 | 5 | 1 | 3 | 0 | 2 | 1 | 1 |
Readme
- Source
- raw.githubusercontent.com
Gemini CLI for Sublime Text
This package provides an agentic interface to the google Gemini CLI directly within Sublime Text.
If you are a Codex or Claude Code user, please explore TermMate in SublimeText.
For detailed usage and features, please refer to the Gemini CLI for Sublime Text Guide.
Prerequisites
This plugin relies on the Google Gemini CLI. Install the required CLI tool:
npm install -g @google/gemini-cli
Requirement: gemini-cli version 0.34.0 or higher. For detailed installation, refer to the geminicli official docs.
Note: The plugin automatically detects CLI installation across multiple environments, including Homebrew, npm-global, Yarn, and common local binary directories. You typically don't need to manually configure environment variables or search paths.
Install GeminiCLI plugin from Package Control
The easiest way to install this plugin is through Package Control.
- Open the command palette (
Cmd+Shift+Pon macOS,Ctrl+Shift+Pon Windows/Linux). - Type
Package Control: Install Packageand pressEnter. - Search for
GeminiCLIand pressEnter.
The plugin automatically detects gemini-cli. If the command line tool is installed elsewhere, or you wish to use a specific geminiversion, you can manually set the path in Preferences -> Package Settings -> GeminiCLI -> Settings
For example set the "gemini_command" in settings with:
- Windows:
"C:/Users/myname/AppData/Roaming/npm/gemini.cmd" - macOS/Linux:
"/usr/local/bin/gemini"
Gemini Authentication
You need to authenticate before using the plugin. Supported methods:
- gemini cli auth: Run
geminiin your system terminal, then type/authto login with your Google account. - API Key: Obtain an API key from Google AI Studio and set it in
Preferences -> Package Settings -> GeminiCLI -> Settings. Google Vertex AI: If you're using Vertex AI on Google Cloud, configure your project and location in the
envsection of your settings:"env": { "GOOGLE_CLOUD_PROJECT": "your-project-id", "GOOGLE_CLOUD_LOCATION": "us-central1" }Ensure you've authenticated with your Google Cloud account via
gcloud auth application-default login.
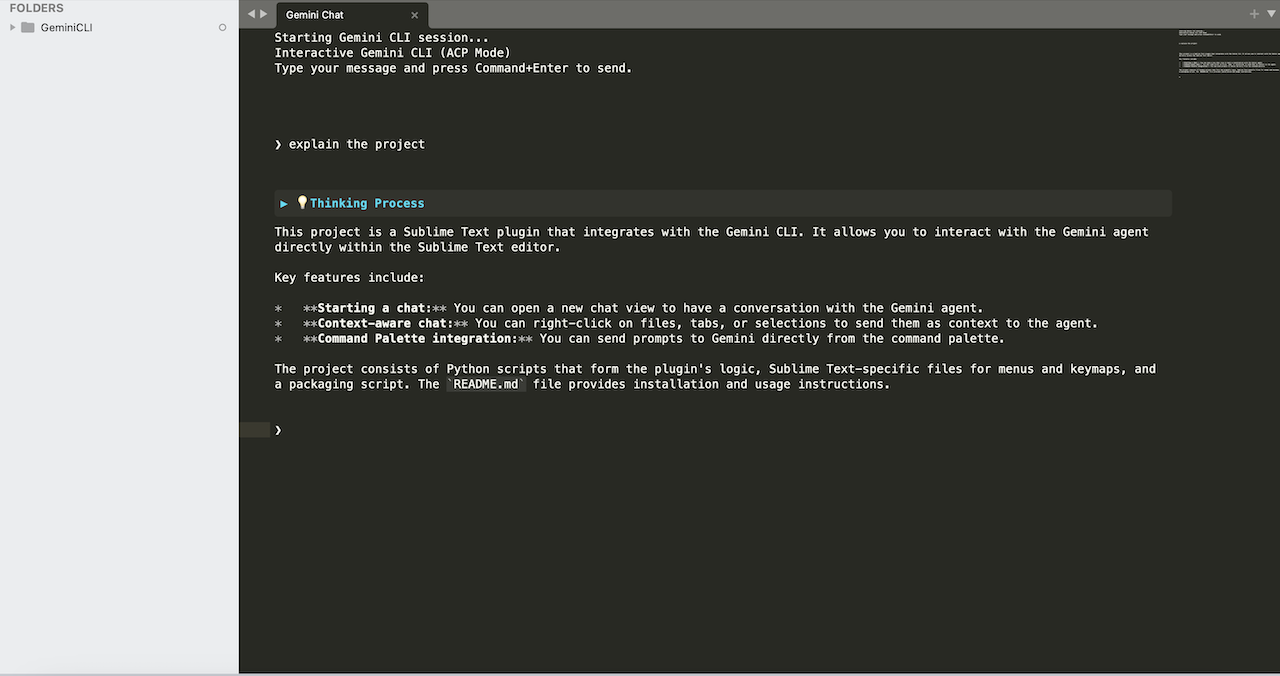
Start Gemini Chat
- Open the command palette (
Cmd+Shift+Pon macOS,Ctrl+Shift+Pon Windows/Linux). - Type
Gemini: Start Chatand pressEnter. - A new view will open for the Gemini chat.
- Alternatively, you can use a shortcut to start the chat (see Key Bindings for configuration).
- Type your message and press
Ctrl+Enter(orSuper+Enteron macOS) to send.
Using Gemini in Sublime Text
Chat with Current File or Selection
You can right-click in any file, tab, or item in the sidebar, and select Chat with Gemini agent. This will:
- Open the Gemini chat view (if not already open).
- Insert a reference to the file (
@filename) or selected line range (@filename#L1-10) into the message prompt. - Tagged files will be automatically sent as context to Gemini.
Set Gemini Working Space
Right-click on any folder in the sidebar and select Set Gemini Working Space to set the primary working directory for Gemini. This affects the current working directory when Gemini executes commands or accesses files.
Additionally, this plugin supports Sublime Text's multi-root workspaces. By default, it injects all currently open folders into the Gemini CLI automatically, ensuring the agent can access your entire open project across multiple roots. This can be disabled via the share_workspace_folders setting in GeminiCLI.sublime-settings.
Quick Prompt Without Chat View
Use the command palette (Gemini: Prompt) to send a quick instruction to Gemini without opening the chat view manually.
Gemini Approval Mode
Gemini CLI performs various actions (tools) like reading files, searching the web, or executing commands. You can control how much manual approval is required for these actions via the command palette: Gemini: Approval Mode
- Default: Prompts for your approval by default.
- Allow Edit: Automatically approves “safe” read/edit operations; still prompts for “risky” commands.
- Accept All: Automatically approves all tool calls, including shell command execution.
Select Model
Use the command palette (Gemini: Select Model) to choose the desired model for your current Gemini session.
Clear Session
To reset the current conversation history and start a completely fresh context, open the command palette and run Gemini: Clear Session. This will reload the agent and clear its memory for the current workspace.
Key Bindings
In the Gemini chat view, you can use the Up and Down arrow keys to scroll through your input history.
This package does not include a global shortcut by default. You can add key bindings manually:
- Go to
Preferences -> Key Bindings. - Add the following lines to your user keymap file:
- Now you can use the shortcut
Primary+Alt+Gto start Gemini Chat (maps toCtrl+Alt+Gon Windows/Linux andSuper+Alt+Gon Mac).
[
    {
        "keys": ["primary+alt+g"],
        "command": "gemini_cli",
        "context": [
            { "key": "is_widget", "operand": false }
        ]
    }
]
Manual Installation from github
- Open Sublime Text and navigate to
Preferences->Browse Packages.... - This will open the
Packagesdirectory. clone the repository from github into the directory: │ - Rename the repository folder to
GeminiCLIdirectory; and Restart Sublime Text.
Gemini Context Interaction and Data Privacy
By default, this plugin does not send your entire workspace or file contents to Gemini. Data is only sent to the Google Gemini CLI in the following scenarios:
- Chat Messages: Any text you type directly into the Gemini Chat view.
- Explicit Context (@-mentions): When you use the
@filenamesyntax (either manually or via the “Gemini: Chat with this file” context menu), the content of the specified file or selected range is sent. - Tool-driven Context: If the Gemini agent requests to read a file or list a directory (and you have granted permission if required by the CLI), that information is sent back to the model as part of the interaction.
All communication happens via the gemini CLI tool installed on your system, which connects directly to Google's servers using your configured credentials (API key or OAuth).
License
This project is licensed under the MIT License - see the LICENSE file for details.