webAgent
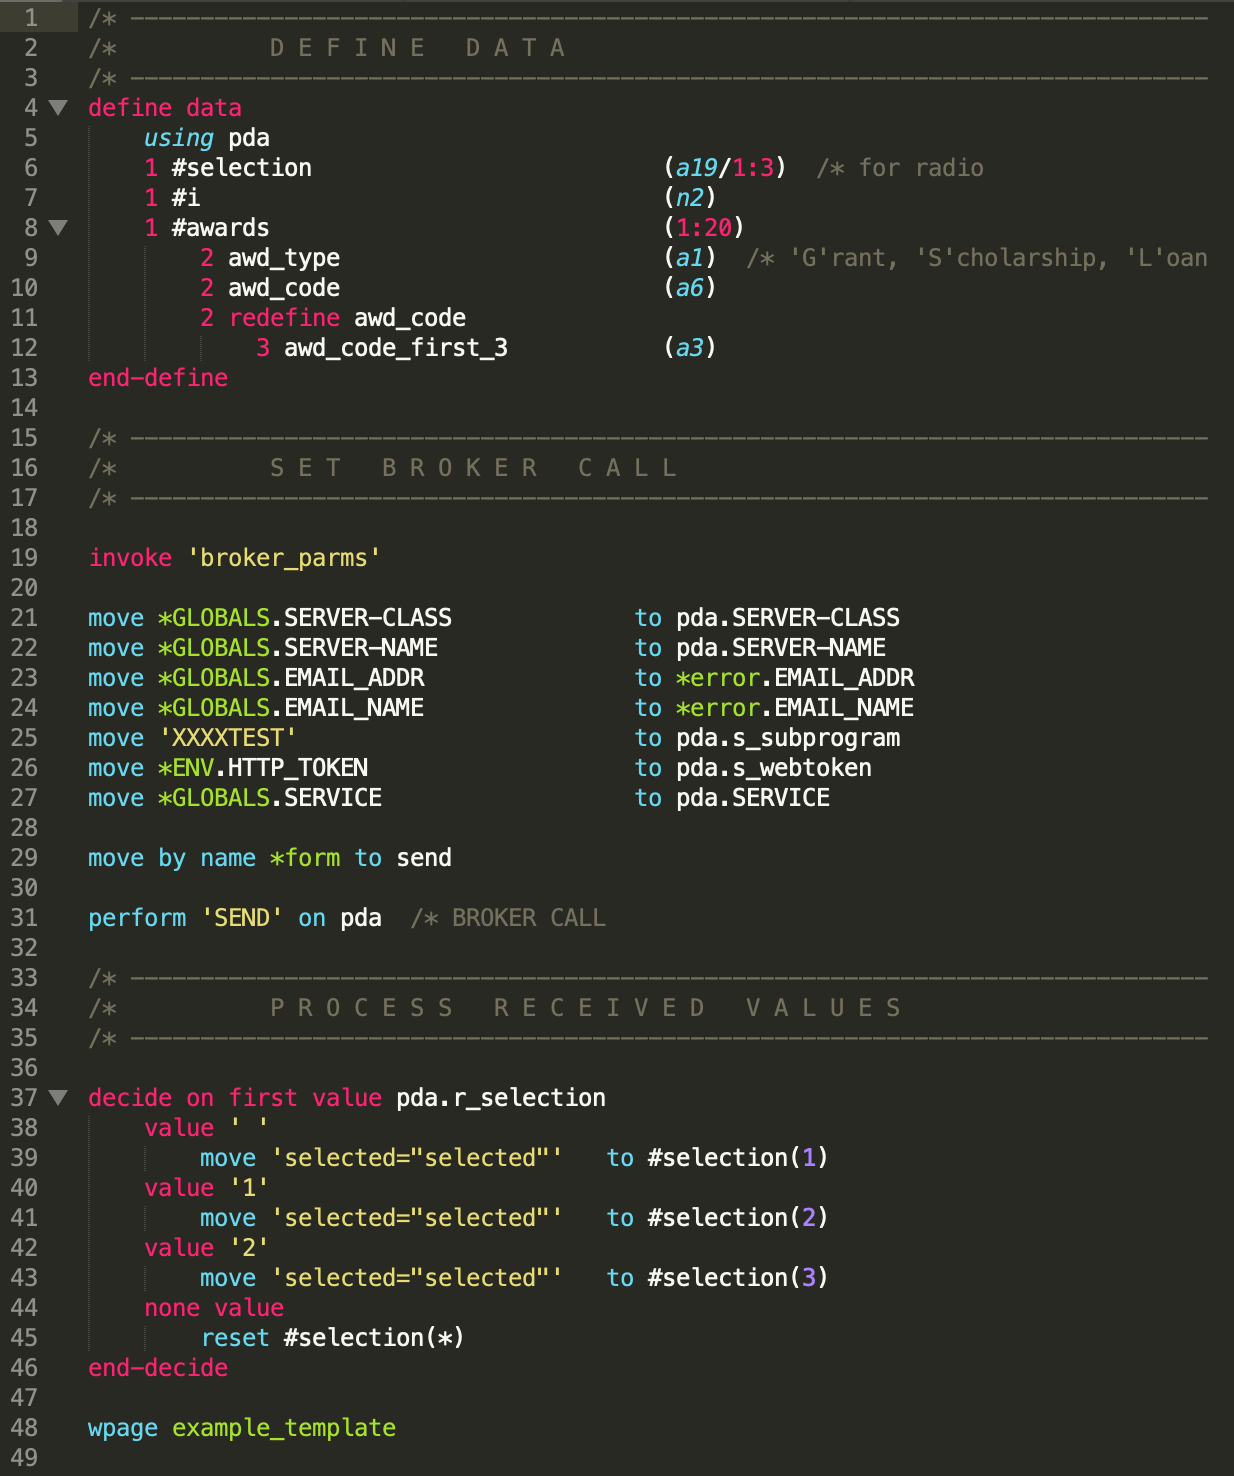
Syntax highlighting for the niche "webAgent" programming language in Sublime Text.
Details
Installs
- Total 94
- Win 56
- Mac 22
- Linux 16
| Jul 28 | Jul 27 | Jul 26 | Jul 25 | Jul 24 | Jul 23 | Jul 22 | Jul 21 | Jul 20 | Jul 19 | Jul 18 | Jul 17 | Jul 16 | Jul 15 | Jul 14 | Jul 13 | Jul 12 | Jul 11 | Jul 10 | Jul 9 | Jul 8 | Jul 7 | Jul 6 | Jul 5 | Jul 4 | Jul 3 | Jul 2 | Jul 1 | Jun 30 | Jun 29 | Jun 28 | Jun 27 | Jun 26 | Jun 25 | Jun 24 | Jun 23 | Jun 22 | Jun 21 | Jun 20 | Jun 19 | Jun 18 | Jun 17 | Jun 16 | Jun 15 | Jun 14 | |
|---|---|---|---|---|---|---|---|---|---|---|---|---|---|---|---|---|---|---|---|---|---|---|---|---|---|---|---|---|---|---|---|---|---|---|---|---|---|---|---|---|---|---|---|---|---|
| Windows | 0 | 0 | 0 | 0 | 0 | 0 | 0 | 0 | 0 | 0 | 0 | 0 | 0 | 0 | 0 | 0 | 0 | 0 | 0 | 0 | 0 | 0 | 0 | 0 | 0 | 0 | 0 | 0 | 0 | 0 | 0 | 0 | 0 | 0 | 0 | 0 | 0 | 0 | 0 | 0 | 0 | 0 | 0 | 0 | 0 |
| Mac | 0 | 0 | 0 | 0 | 0 | 0 | 0 | 0 | 0 | 0 | 0 | 0 | 0 | 0 | 0 | 0 | 0 | 0 | 0 | 0 | 0 | 0 | 0 | 0 | 0 | 0 | 0 | 0 | 0 | 0 | 0 | 0 | 0 | 0 | 0 | 0 | 0 | 0 | 0 | 0 | 0 | 0 | 0 | 0 | 0 |
| Linux | 0 | 0 | 0 | 0 | 0 | 0 | 0 | 0 | 0 | 0 | 0 | 0 | 0 | 0 | 0 | 0 | 0 | 0 | 0 | 1 | 0 | 0 | 0 | 0 | 0 | 0 | 0 | 0 | 0 | 0 | 0 | 0 | 0 | 0 | 0 | 0 | 0 | 0 | 0 | 0 | 0 | 0 | 0 | 0 | 0 |
Readme
- Source
- raw.githubusercontent.com
webAgent Syntax
Syntax highlighting for the “webAgent” language in Sublime Text.
Installation
You can install this package from Package Control (recommended) or manually. Package Control will automatically keep the package up-to-date. Manual installation is required if you want to edit the code or contribute.
Install via Package Control
- Install Sublime Package Control.
- In Sublime Text, open the Package Control command palette by pressing
ctrl+shift+p(Win, Linux) orcmd+shift+p(Mac). - Type “Package Control: Install Package” and hit return. A list of available packages will be displayed.
- Type “webAgent” and hit return. The package will be installed.
Install manually
- In Sublime Text, select “Preferences” > “Browse Packages”. This opens your Sublime Text package directory.
- Clone this repo to your Sublime Text package directory.